Lone Rider MTL9 Motorcycle Headlights Review

Lone Rider MTL9 Motorcycle Headlights Review

Let There Be Light: 23,200 Lumens, Intelligently Controlled

Auxiliary lights can be found cheaply, compactly, and often directly from the motorcycle manufacturer. However, the Lone Rider MTL9 aim to be far more than just two powerful lights. On the BMW R 1300 GSA, we explore whether 180-watt LEDs, MotoCAN integration, and an especially intelligent control justify the premium price tag.

nopain

nopain

published on 14/08/2026

1,781 Views

Modern motorcycle headlights are impressively powerful today, but even the standard LED light of a BMW R 1300 GS Adventure eventually reaches its physical limits. Specifically, where the rider needs to see more than just asphalt at night: far beyond the next roadside marker, deep into the curve radius, and especially to the left and right of the road where deer, hefty hares, or an unlit tractor rarely stay politely in the light beam. Even during the day, in dense city traffic, in diffuse weather, or with a low sun, extra presence can be crucial. Being seen sooner simply provides more safety margin.

Auxiliary lights fill exactly this gap. Accordingly, there are numerous model-specific solutions available, both from BMW itself and from well-known accessory manufacturers. The central question is therefore not whether the Lone Rider MTL9 Motorcycle Lights shine brighter than classic auxiliary lights. They do. More intriguing is the extent to which their added value from the smart combination of light output, light distribution, robustness, and integration goes beyond the usual principle of "two lamps, one relay, one switch" and whether the high price is justified in real-world use.

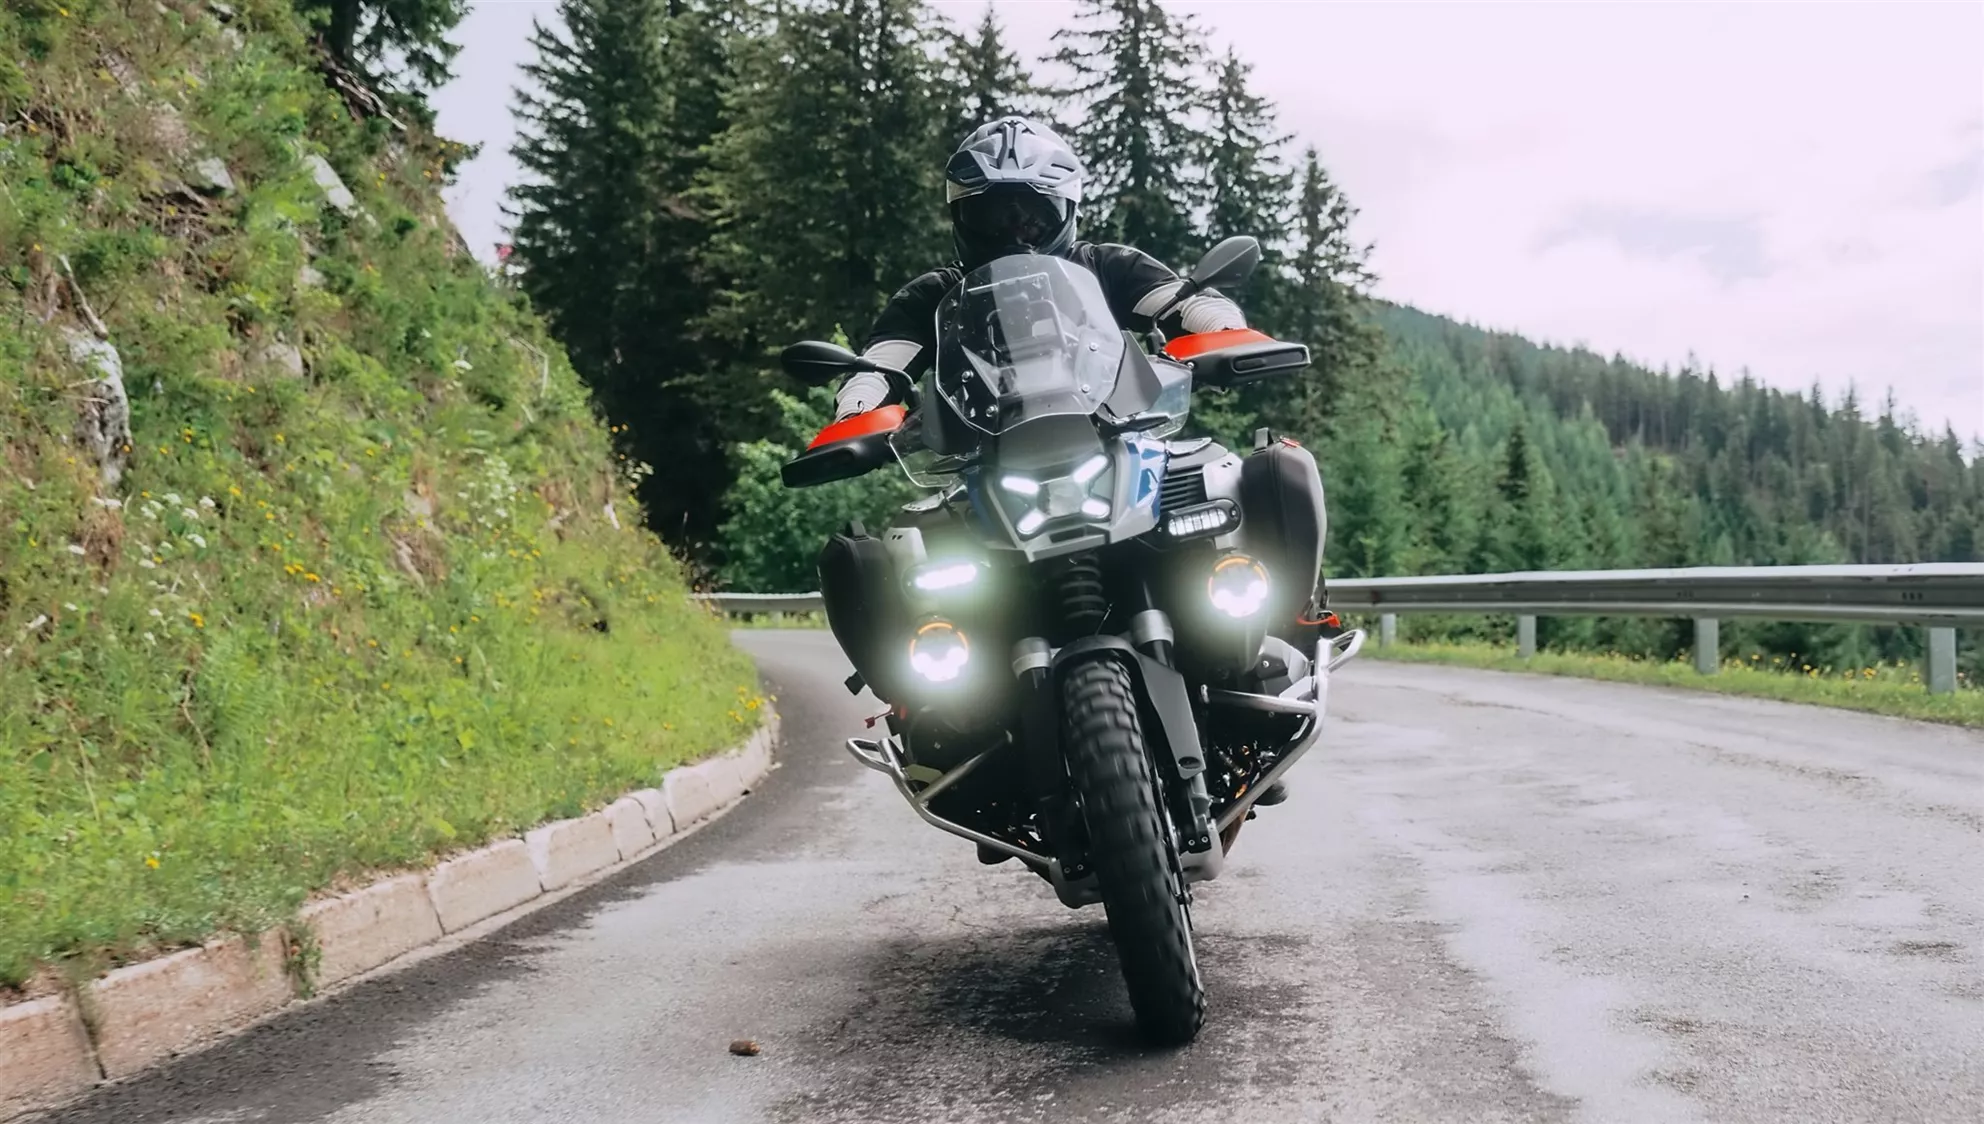
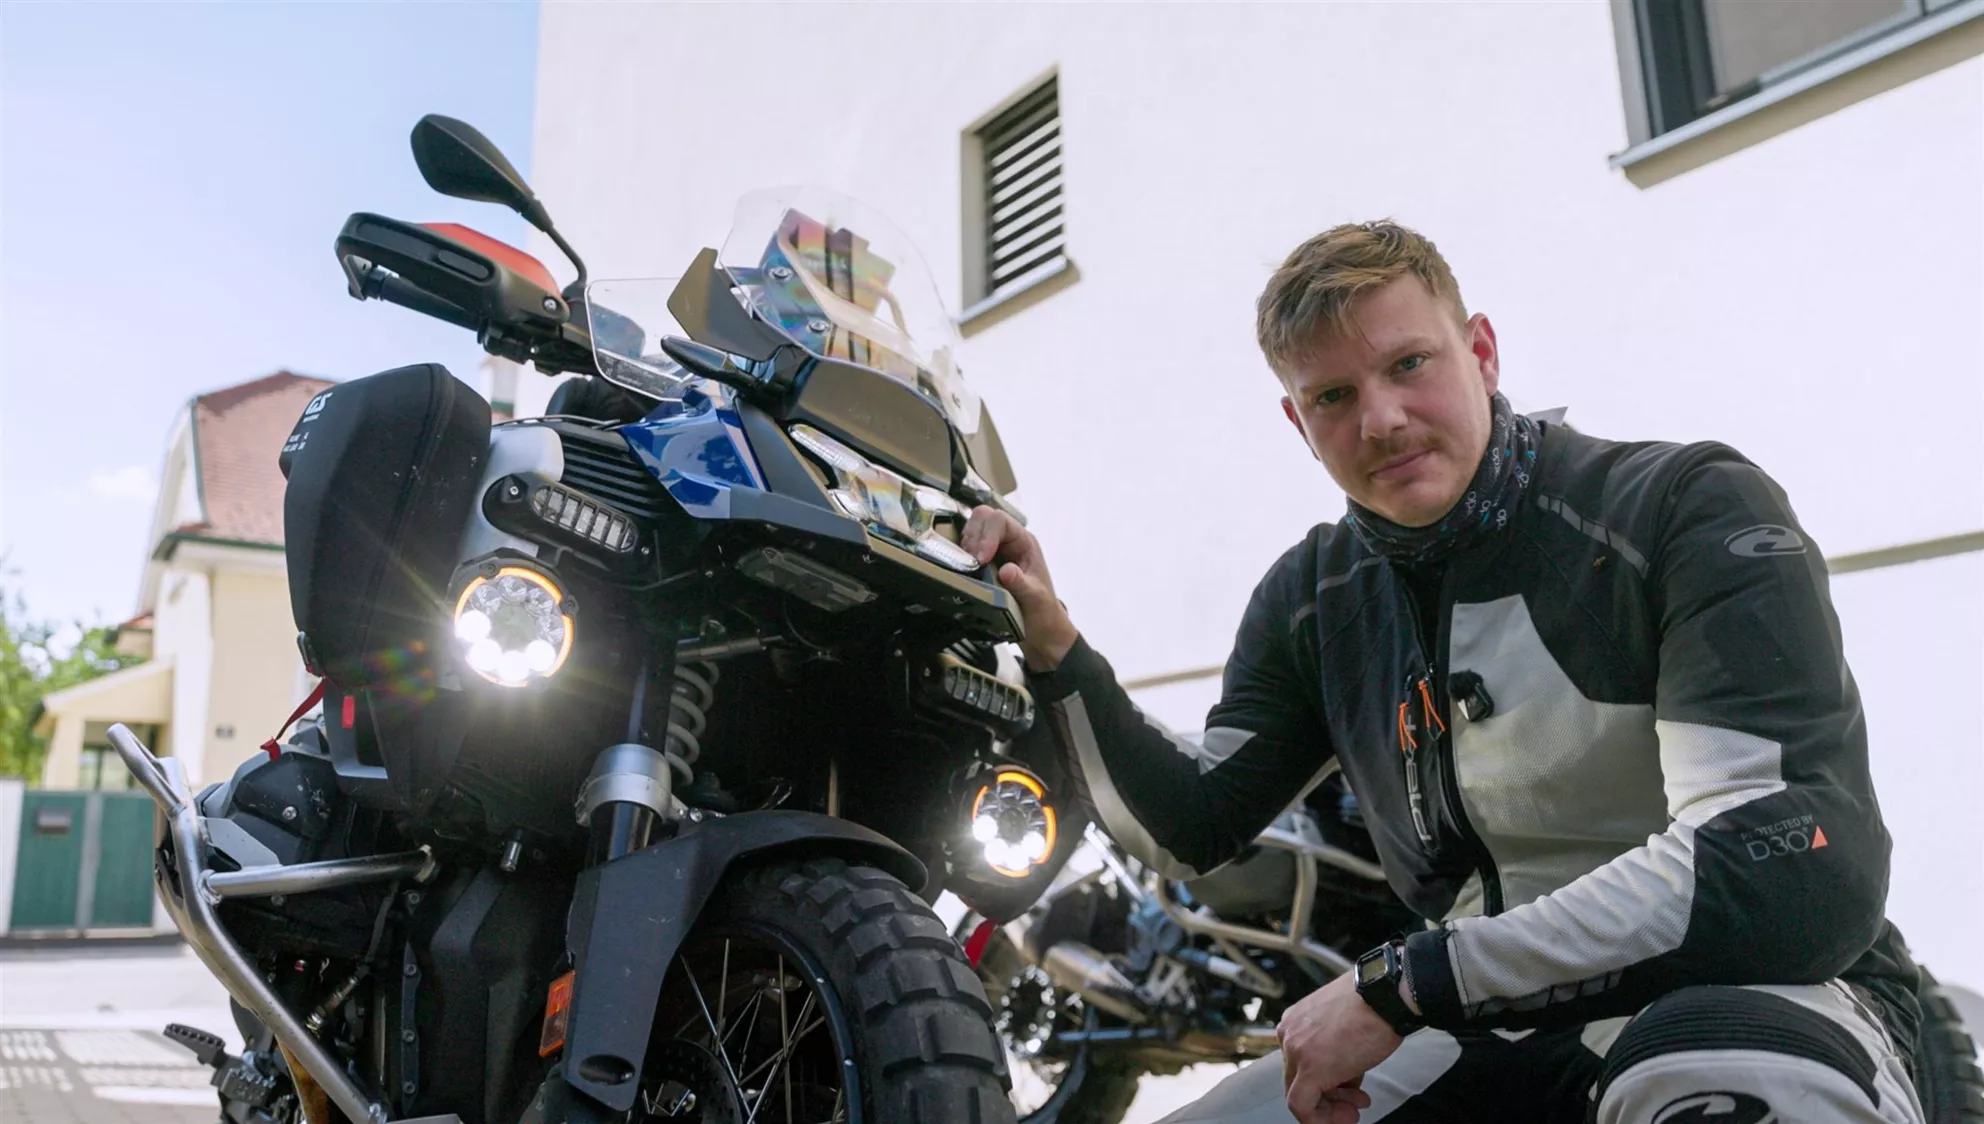
The MTL9s integrate position lights, a wide close-range light, high beam, and an intensely focused spot within two robust housings. They communicate with the BMW via MotoCAN and are operable through the standard controls.

This makes them ideal for connoisseurs, frequent riders, commuters, adventure tourers, and night owls who regularly navigate through wildlife crossings, bad weather, or far from well-lit roads.
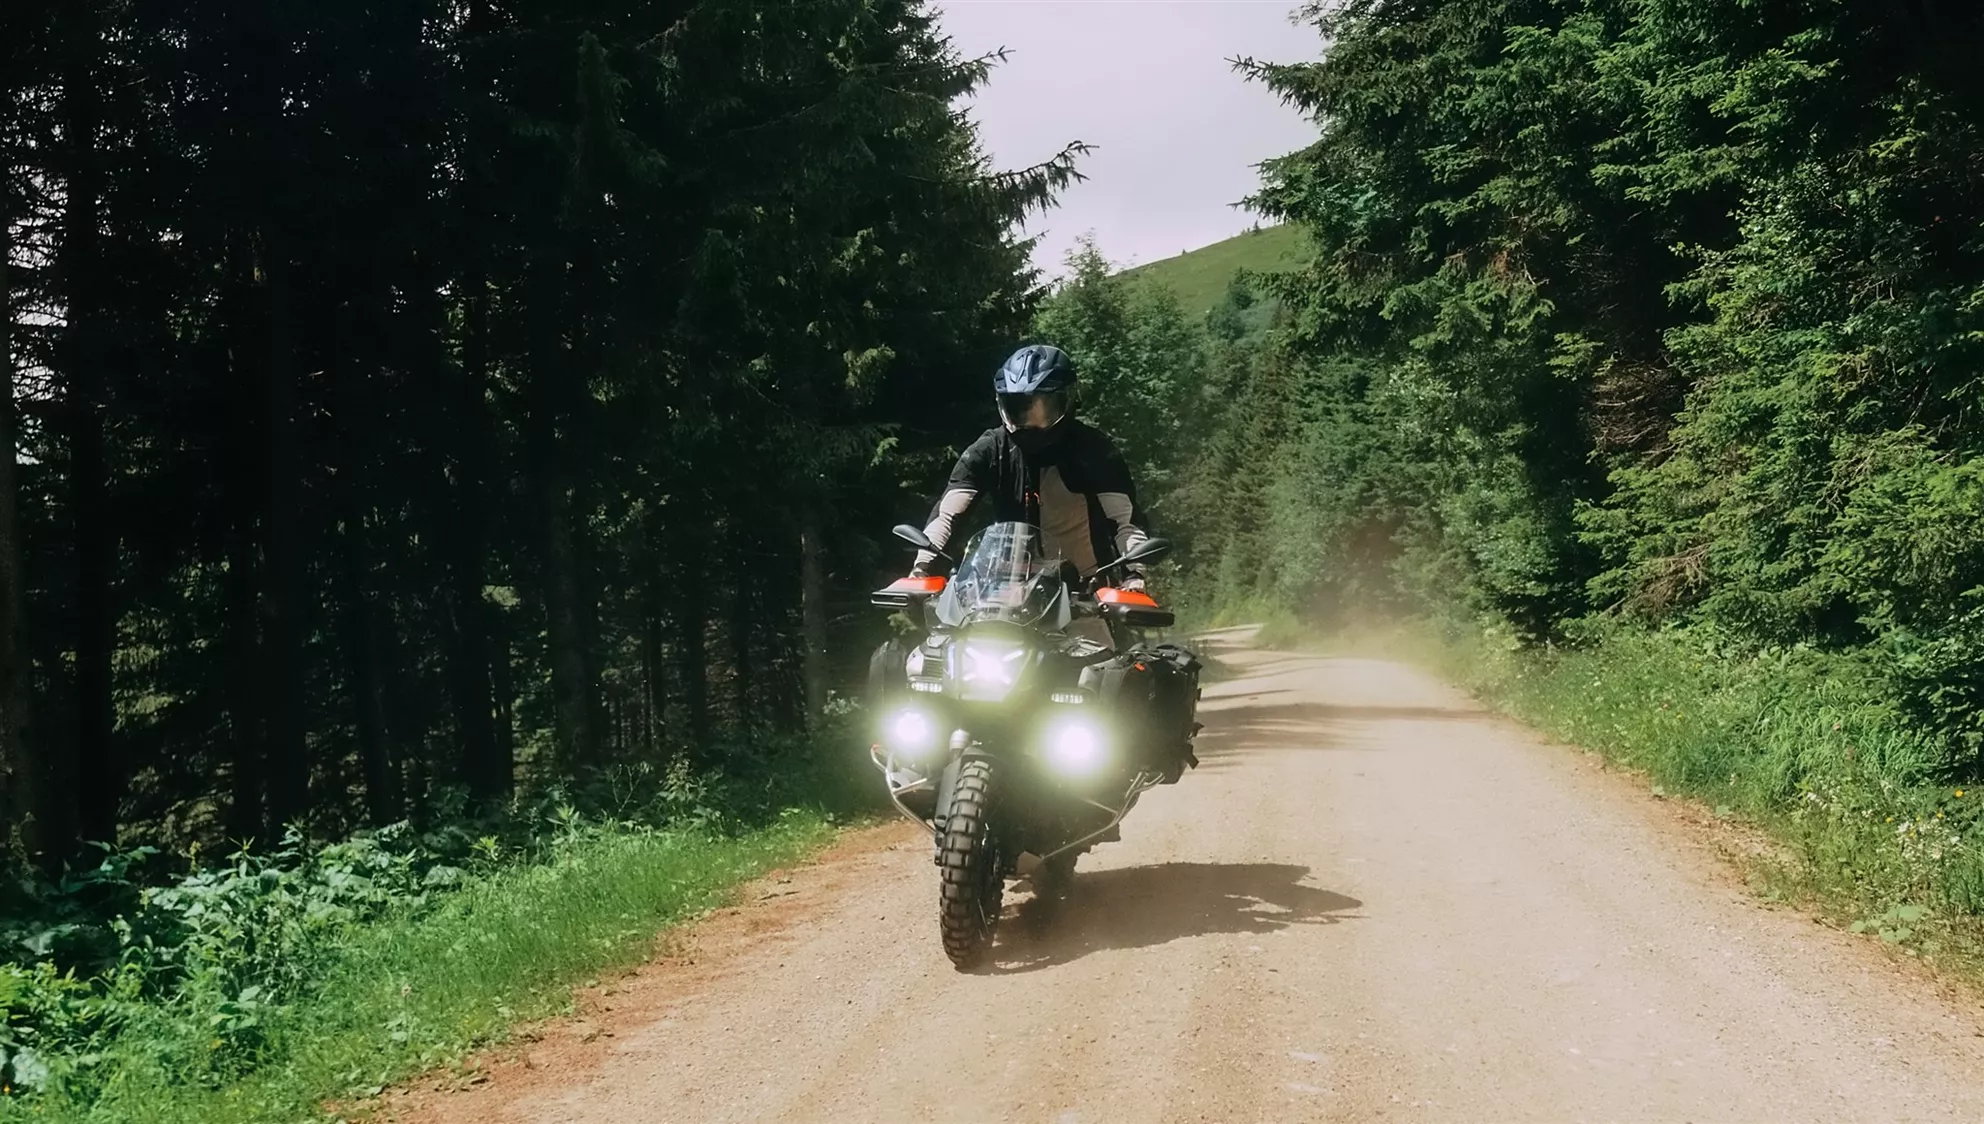
Lone Rider MTL9 Offroad Performance

What Sets the Lone Rider MTL9 Apart from the Competition

Lone Rider confidently labels the MTL9 as "the world's most intelligent auxiliary lighting system for motorcycles." Such superlatives usually smack of marketing hype as soon as you open the manufacturer's website, but there's genuinely more here than just an app and a flashy ring. Each light features separate zones for close-range, distance, and position lighting. Through MotoCAN, the system taps into signals like high beams, turn signals, hazard lights, horn, speed, and whether it's day or night. These lights aren't just electrical add-ons; they integrate seamlessly into the existing control logic of the motorcycle.

The real-world advantage is significant: In urban settings, the MTL9s are subtle, on dark country roads, they provide broad illumination, and at higher speeds, they automatically extend their range. There's no need for a separate controller or navigating through nested menus. However, there's a slight risk of human over-enthusiasm; setting everything to 100% might create impressive light beams but won't win you any friends among oncoming traffic. The system has immense capabilities but requires sensible configuration.

Lone Rider MTL9 Lights

First Impressions – Lone Rider MTL9

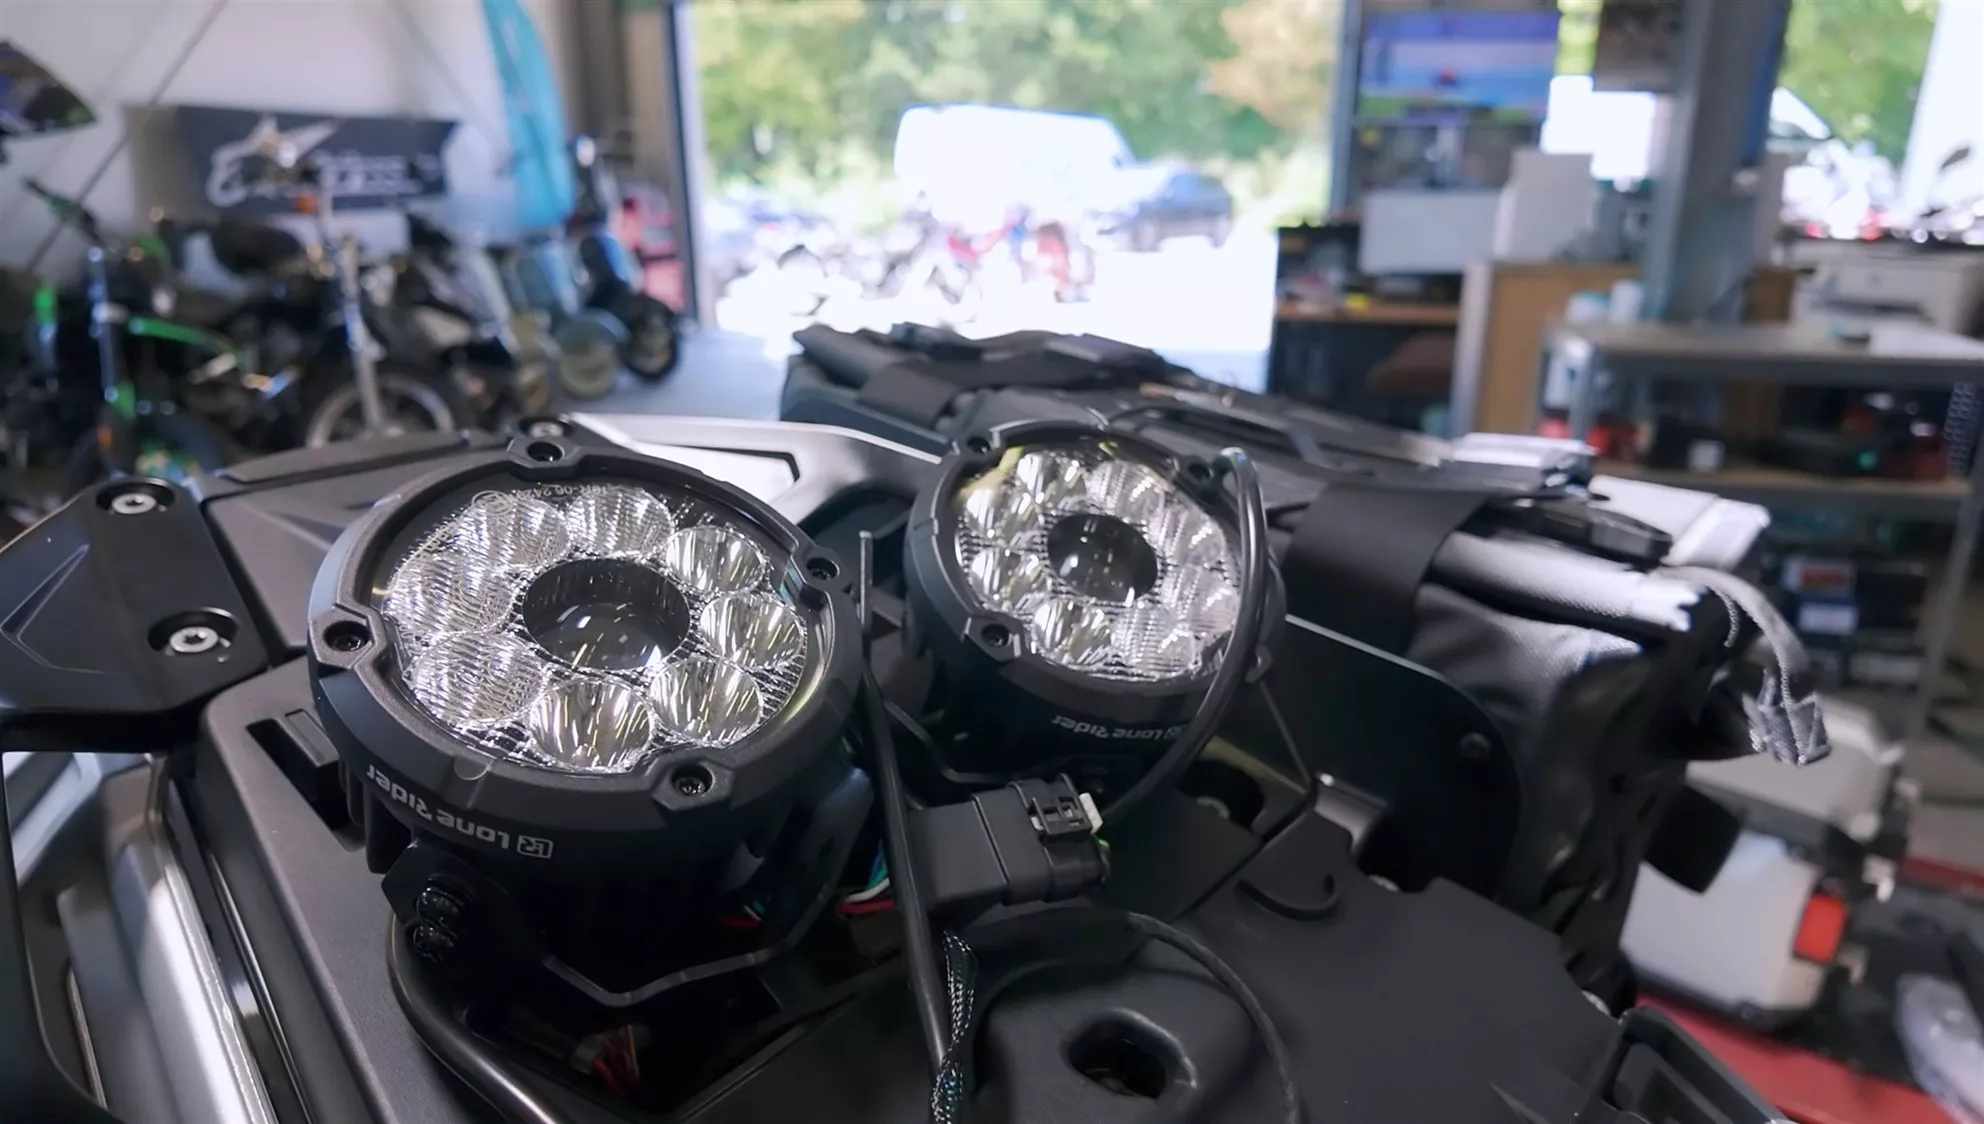
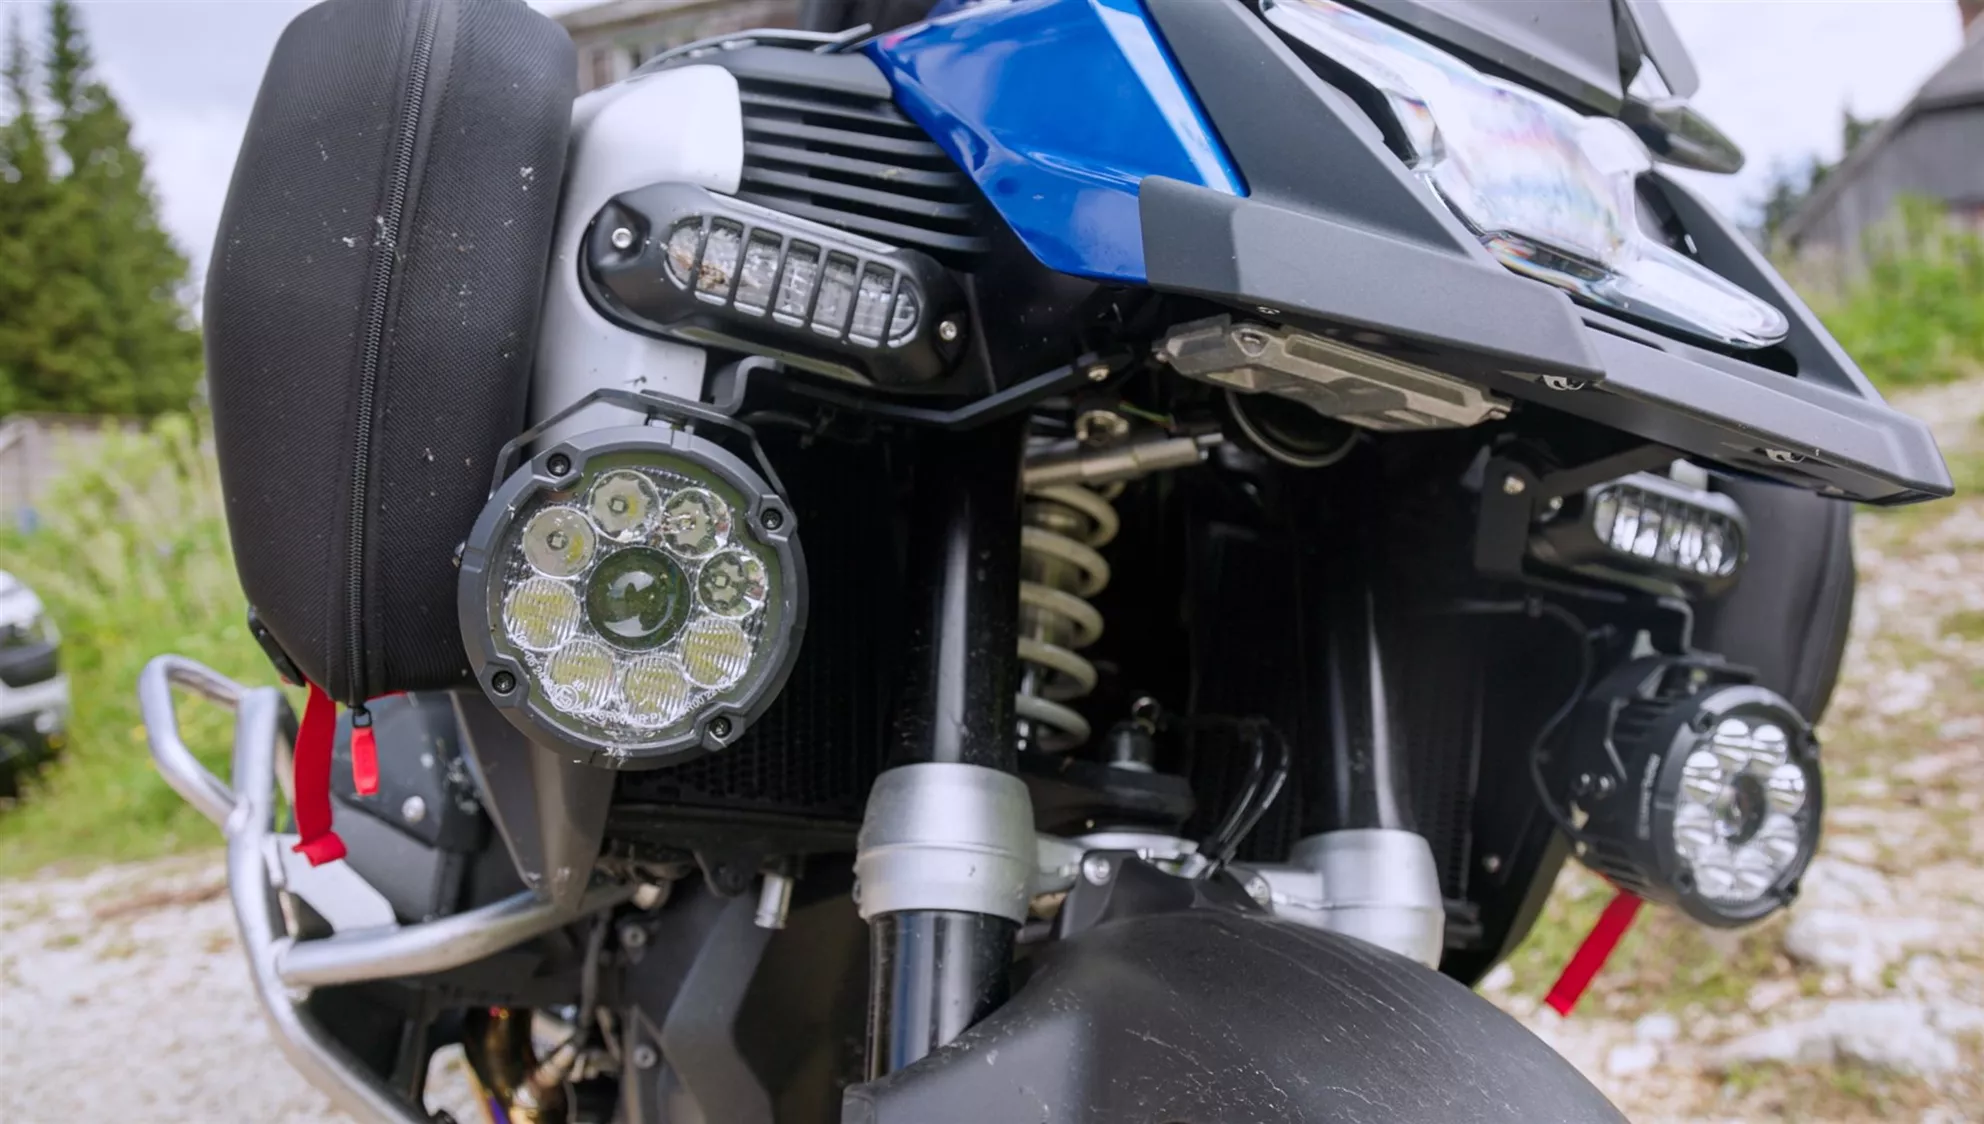
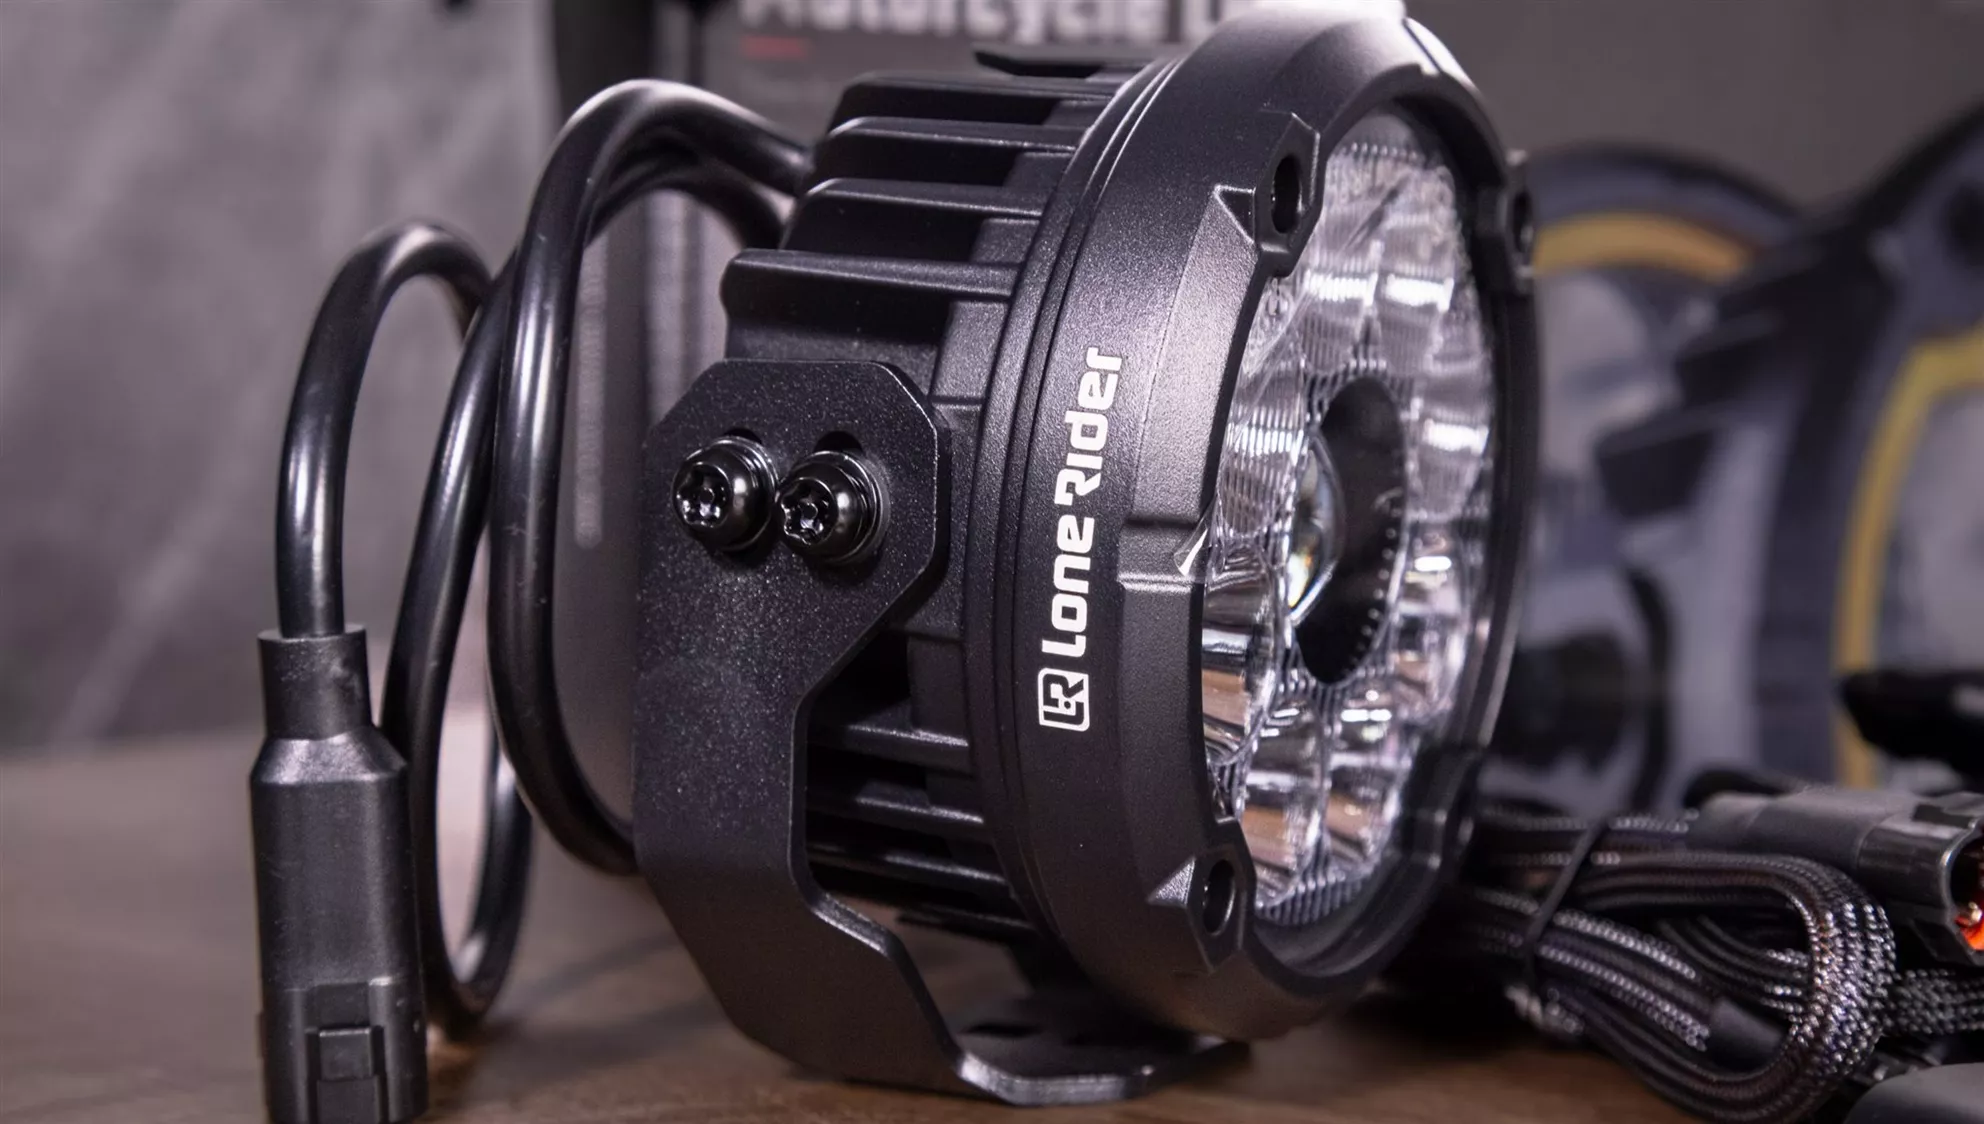
The two round MTL9 headlights appear robust, meticulously crafted, and with their deep cooling fins, resemble industrial lighting technology. Each lamp measures 114 millimeters in diameter, is 75 millimeters deep, reaches a height of 125 millimeters with the bracket, and weighs 840 grams. Together, they weigh in at 1,680 grams before adding brackets, wiring, and the MotoCAN. It's no lightweight, but a BMW R 1300 GSA won't be fazed by that.

The black aluminum housing, polycarbonate lens, and stainless steel bracket exude the kind of solidity you'd expect from an adventure tourer. The technical documents specify a clear Lexan lens with UV coating, a black aluminum housing, and insulated copper wiring. Connectors, blind plugs, and brackets also appear high-quality, cables are well-sized, and protective strips and rubber inserts prevent vibrations and shocks from quickly polishing the crash bar to a shine.

Lone Rider MTL9 Technology

Technical Specifications: Lone Rider MTL9 Motorcycle Lights

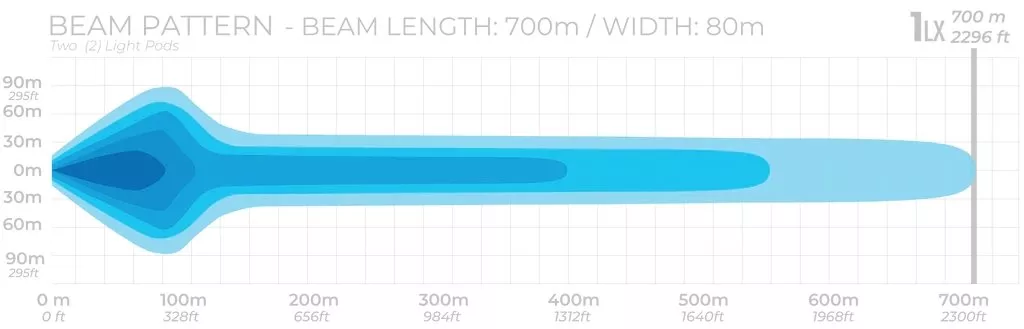
Lone Rider states a maximum system output of 180 watts for the pair, a luminous flux of 23,200 lumens, a power consumption of 145 watts, and an operating voltage of 9 to 30 volts DC. The central spot is said to produce 1 lux at 700 meters. Additionally, the lights are rated IP68 and IP69K, with an allowable temperature range from −20 to +50 degrees Celsius, featuring Osram LEDs.

Description;Value
Product;Lone Rider MTL9 Motorcycle Lights
Test Motorcycle;BMW R 1300 GS Adventure
Other Compatible Models (with appropriate MotoCAN Module)*;BMW R1300GS / R1300GS Adventure BMW R1250GS / R1250GS Adventure BMW R1200GS / R1200GS Adventure BMW F900GS F850GS Adventure F800GS (2024+) Honda Africa Twin 1100 / Adventure Sports KTM 1290 Super Adventure S/R 890 Adventure (R) 790 Adventure (R)
Tested Package;2 MTL9 Lights + MotoCAN + Under Nose Mount
Price RRP (as of 07/23/2026);999 Euro
Maximum System Power;180 W per set
Luminous Flux;23200 lm per set
Power Consumption;145 W per set
Operating Voltage;9-30 V DC
Range;1 Lux at 700 m
Light Pattern;Combo 6-in-1 with DRL
Spot Optics;2 degrees
High Beam per Light;9 non-replaceable LEDs
Position Light per Light;28 non-replaceable LEDs
DRL Colors;White and Amber
LED Manufacturer;Osram
Protection Class;IP68 and IP69K
Operating Temperature;-20 to +50 degrees Celsius
Connection;MT 3-pin
Diameter per Light;114 mm
Depth per Light;75 mm
Height with Bracket per Light;125 mm
Weight per Light;840 g
Weight of Light Pair;1680 g without cables connectors and brackets
Housing;Aluminum
Lens;Polycarbonate
Bracket;Stainless Steel
Certifications;ECE R10 R148 R149
Warranty;5 years

The values are sourced from the current EU product page, homologation documents, and manufacturer documentation.

MTL9 Complete Package Contents for BMW R 1300 GSA (Item No. 55800842649974)

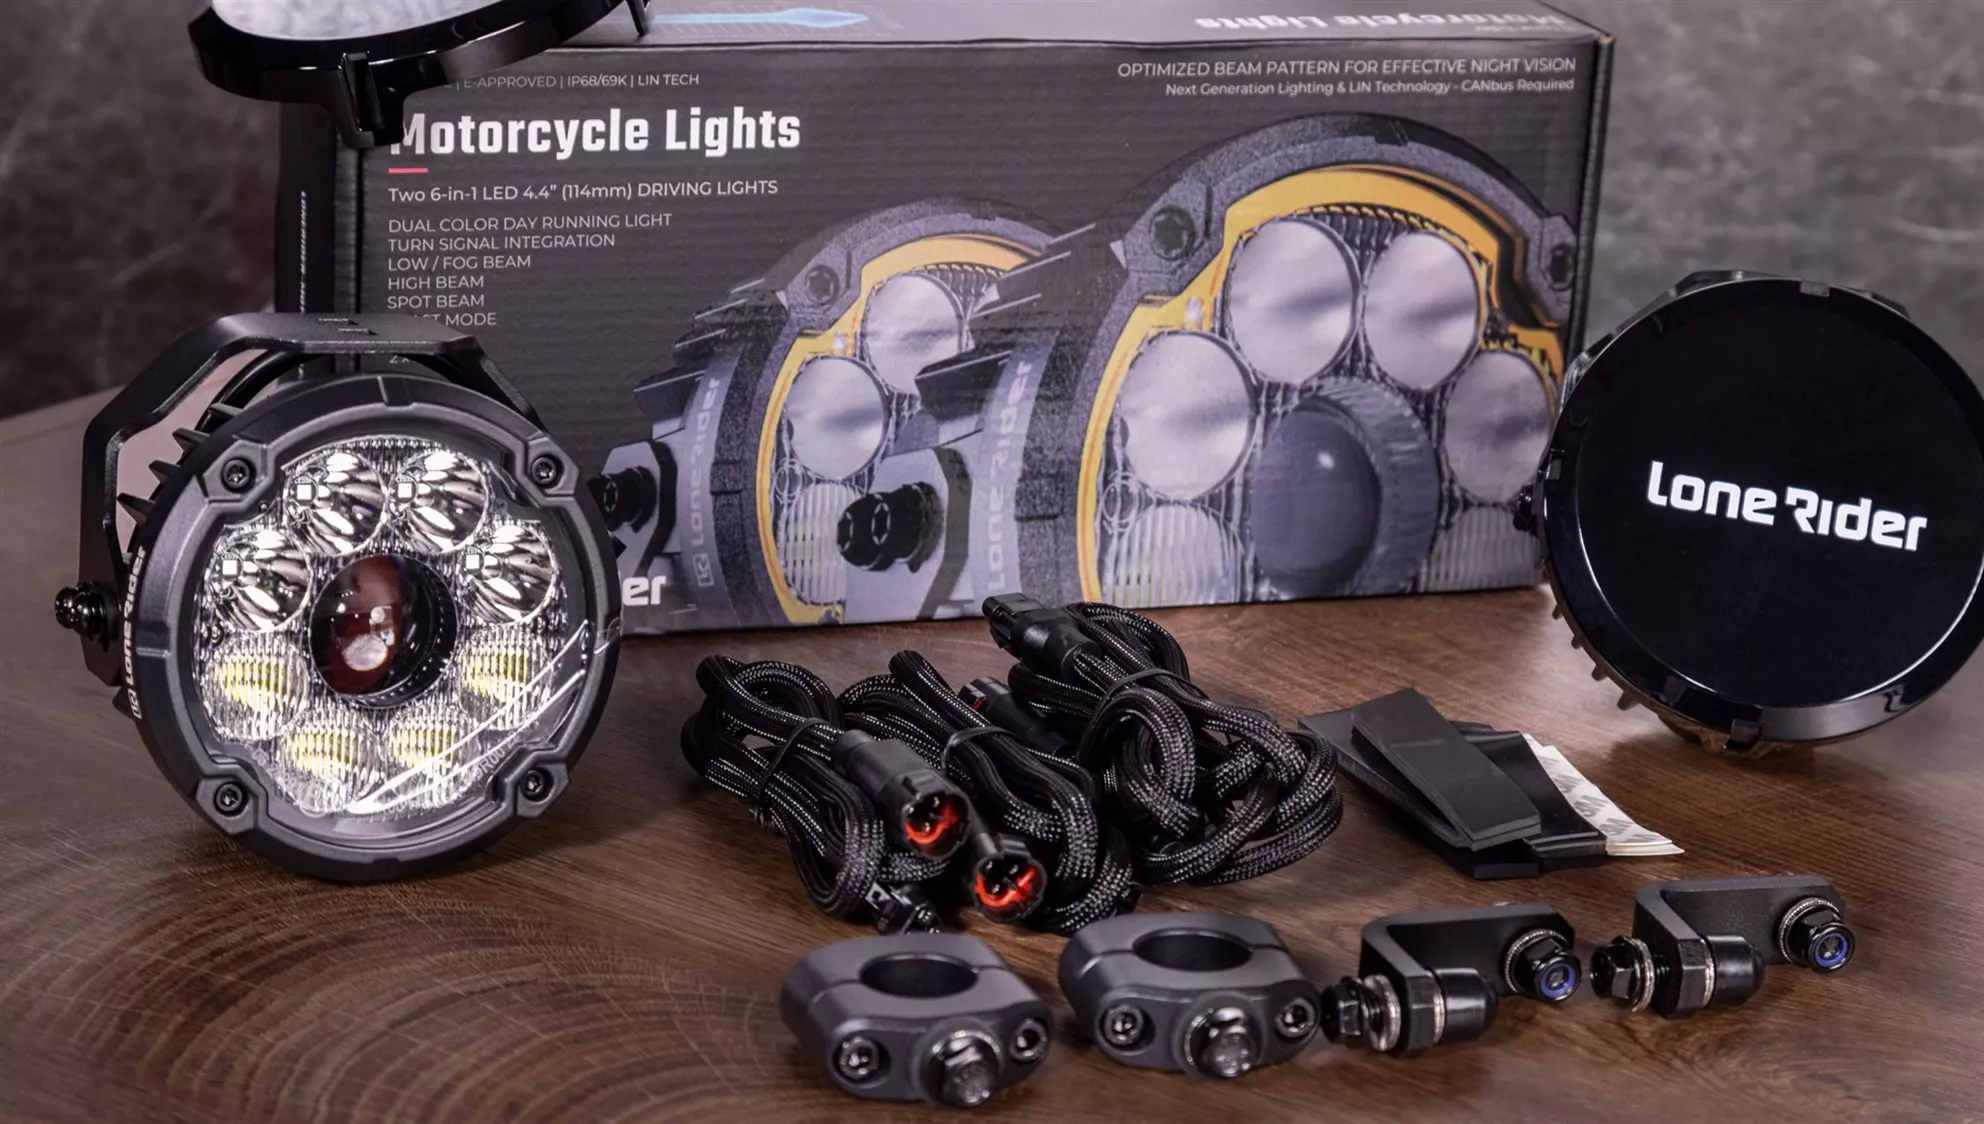
The motorcycle-specific package includes two MTL9 pods with three-pin MT connectors, two black covers, two extension cables each one meter long, a Y-splitter, the so-called under-nose mount for the BMW R 1300 GS Adventure, universal tube clamps, and additional mounting material. Also included are the vehicle-specific MotoCAN, blind plugs, three connectors, rubber seals, a replacement cap for the USB port, twenty cable ties, and the connection cable for computer configuration.

The black covers are not just garage decorations. They protect the lenses during transport or extended periods of non-use and allow the auxiliary lights to be fully covered if necessary. Lone Rider separately offers a transparent stone guard for currently 20 euros. Especially for an adventure tourer that regularly gets pelted with gravel behind other motorcycles, this is a very sensible addition. It's frustrating, however, that this protection is not included as standard in a complete package priced close to the four-figure mark.

MTL9 Lighting Technology

MTL9 Lighting Technology in Detail

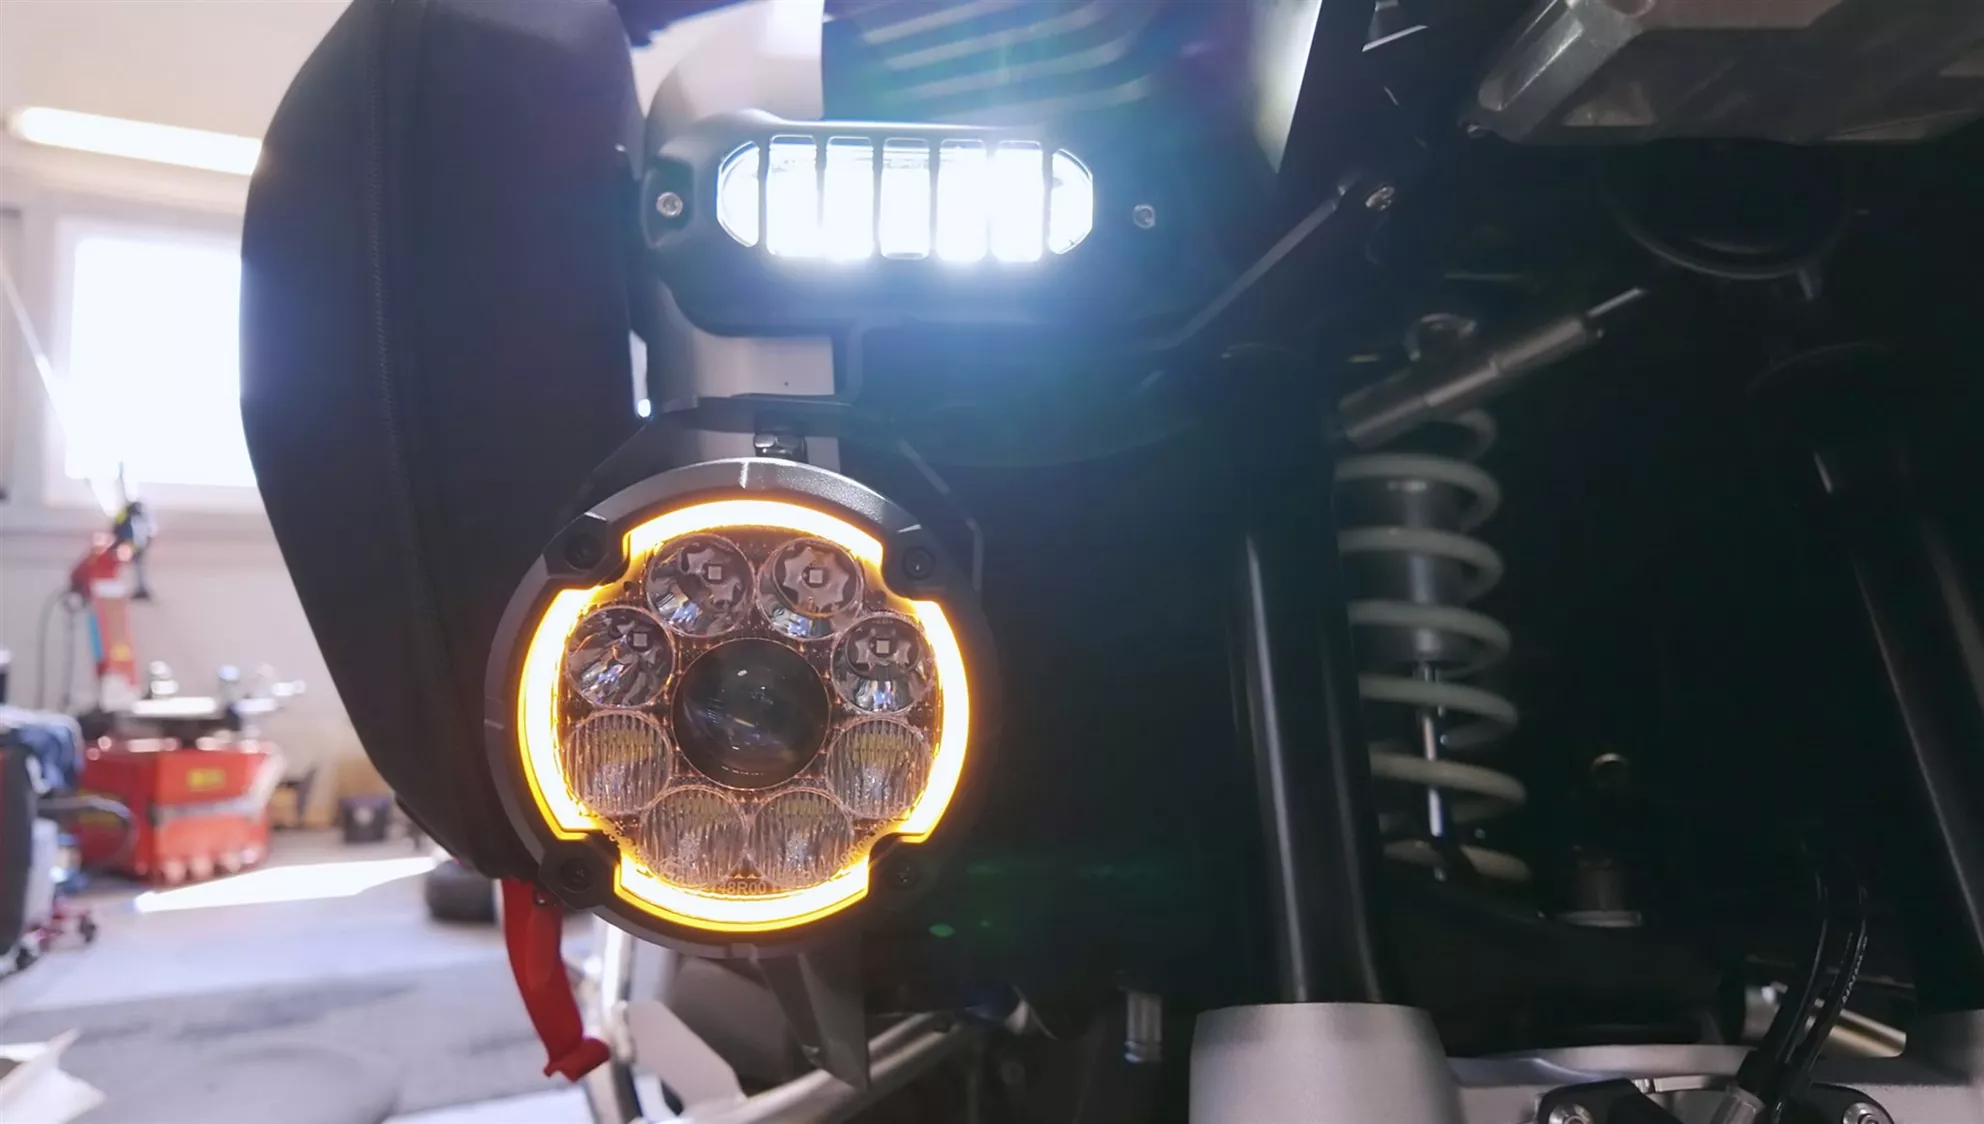
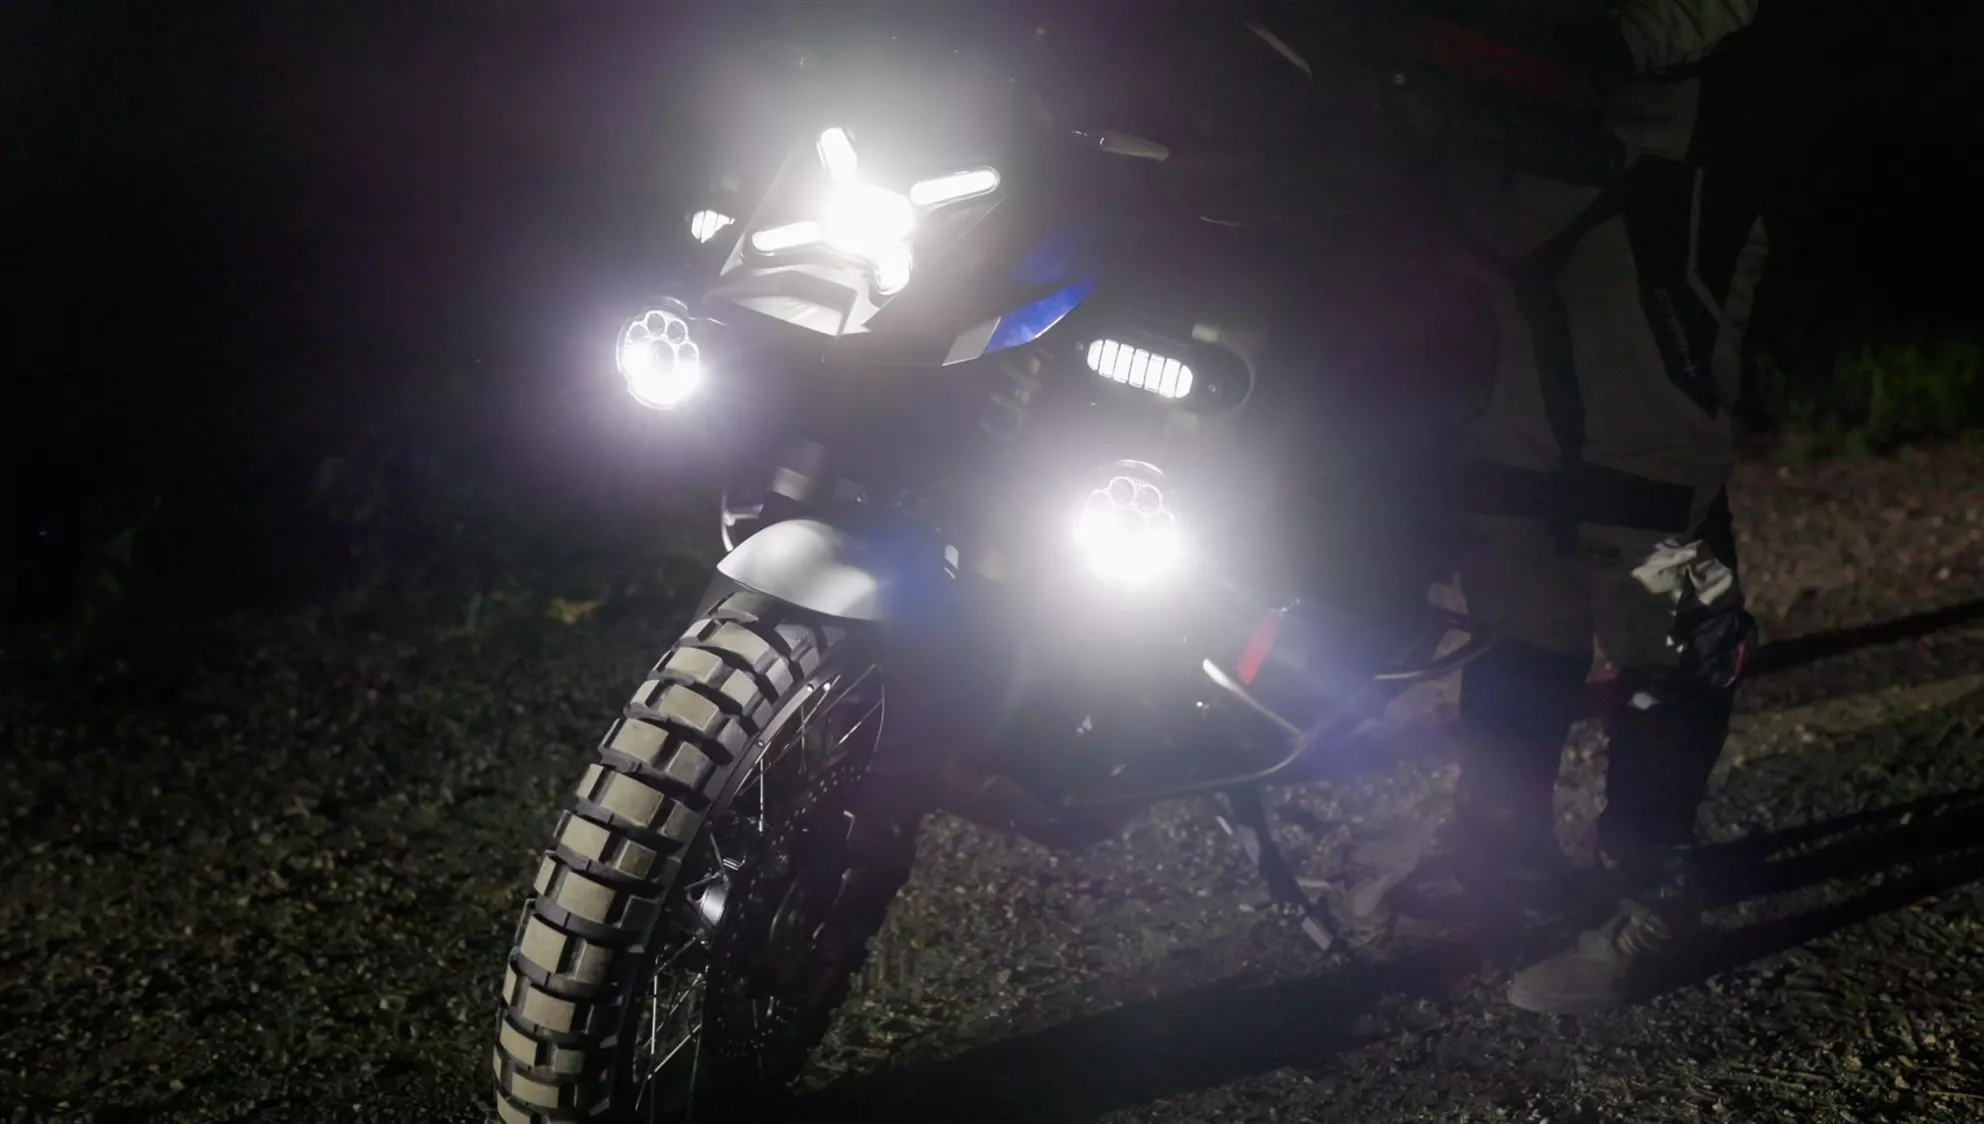
The term "Combo 6 in 1" might initially sound like a description of a Swiss Army knife, but it becomes understandable when you look at the optics. At the center of each light is a highly focused spot LED, whose light is projected into the distance through a 2-degree optic. The lower four LEDs handle the broad illumination of the close and mid-range areas, while the upper four LEDs enhance the actual high beam. Surrounding this is the position light ring, which can glow either white or amber. Lone Rider specifies ten power levels for the ring and the option for complete deactivation.

The homologation documents provide additional details that might be overlooked on the product page. For the white front position light, each housing contains 28 permanently installed LEDs with 12 volts and 6 watts. The high beam utilizes nine permanently installed LEDs with 12 volts and 71 watts and is approved as a Class B headlamp. The LEDs are not replaceable as individual bulbs, which is common in modern, sealed LED systems, but this means that in the event of a defect after the warranty period, the entire module must be replaced or repaired.

MTL9 MotoCAN Integration

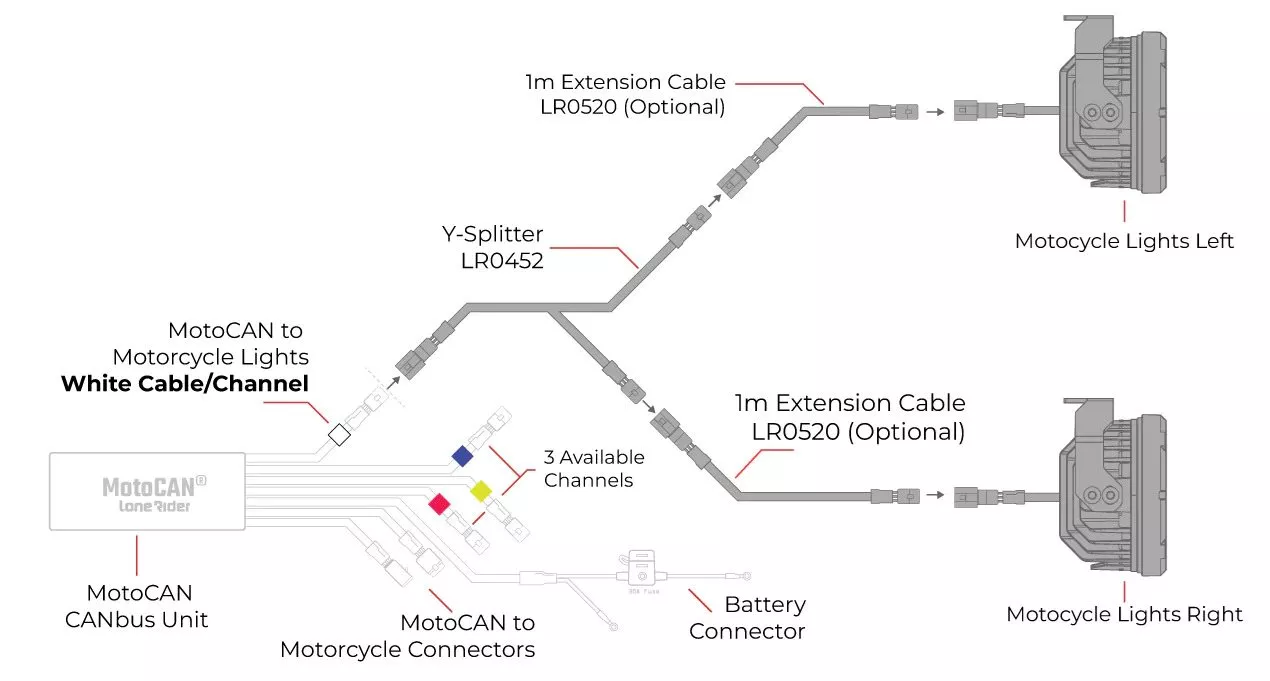
The lights are merely the muscles; the real nervous system is the MotoCAN module. This module connects to the battery and the XDWA or alarm system connector of the BMW and then reads the bike's CAN-Bus signals. This allows the system to recognize high beams, turn signals, hazard lights, horn, speed, and operational status without needing to splice wires or add extra switches. Both MTL9s share a configured output, leaving other MotoCAN channels available for accessories like a horn, auxiliary brake light, or heated components. The conformity declaration also mentions ECE-R10 testing for emissions and electromagnetic compatibility.

The advantage becomes evident while riding, as the lights automatically adjust their output based on ambient light, high beams, and speed. External analysis indicates that each light operates with two circuit boards: one controls the LEDs, and the other translates the communication data. This explains why there's significantly more technology involved than with a traditional auxiliary light with just a positive, negative, and a relay.

MTL9 Installation on the BMW R 1300 GSA

Installing the MTL9 on the BMW R 1300 GSA

The installation follows the same basic pattern for all motorcycles, although the actual complexity depends significantly on the specific model. On the BMW R 1300 GS Adventure, the installation is refreshingly quick and clean, and can be tackled by any skilled wrench with a calm approach and moderately decent tools. Lone Rider plans to release an updated installation video on their channels soon.

The MotoCAN is mounted under the cover on which the rider's seat rests. Then, guide the Y-splitter down the right-hand side of the vehicle, loosen the two screws securing the tank, and remove the side plastic covers beneath the tank. The fuel tank can optionally be slightly lifted to route the cables underneath, though this isn't necessary: the wiring of the Y-splitter can be neatly routed behind the removed covers and connected to the light cables there. Thus, there's no need for a complex disassembly of the tank or larger side panels. In total, only about ten largely identical screws need to be loosened, which keeps the risk of a later screw lottery to a minimum.

MTL9 Installation on the BMW R 1300 GSA

Mounting and Alignment on the GSA

In the tested package, the lights are mounted below the vehicle's nose, which allows them to visually integrate well into the GSA's massive front while also creating a distinctive light triangle with the main headlight. Alternatively, Lone Rider offers tube clamps for diameters of approximately 22 to 25 millimeters. The manufacturer considers the standard plastic mounts of some BMW auxiliary lights not stable enough for the heavy MTL9 pods. Additionally, with under-nose solutions, the combination with existing upper crash bars must be carefully checked.

During installation, protective film, rubber inserts, and cushioning washers are used to protect the coating and mounts. Initially, the pods remain slightly movable. The motorcycle is then aligned on a flat surface and the light beam is adjusted. This final step is not just a cosmetic exercise. Just a few degrees too high can turn the broad light carpet into a mobile interrogation lamp for oncoming traffic. With a fully loaded GSA carrying a passenger and luggage, the vehicle's stance changes further, so the alignment should be checked again after the first night ride under realistic loading conditions.

MTL9 Desktop Configuration

Final Desktop Configuration

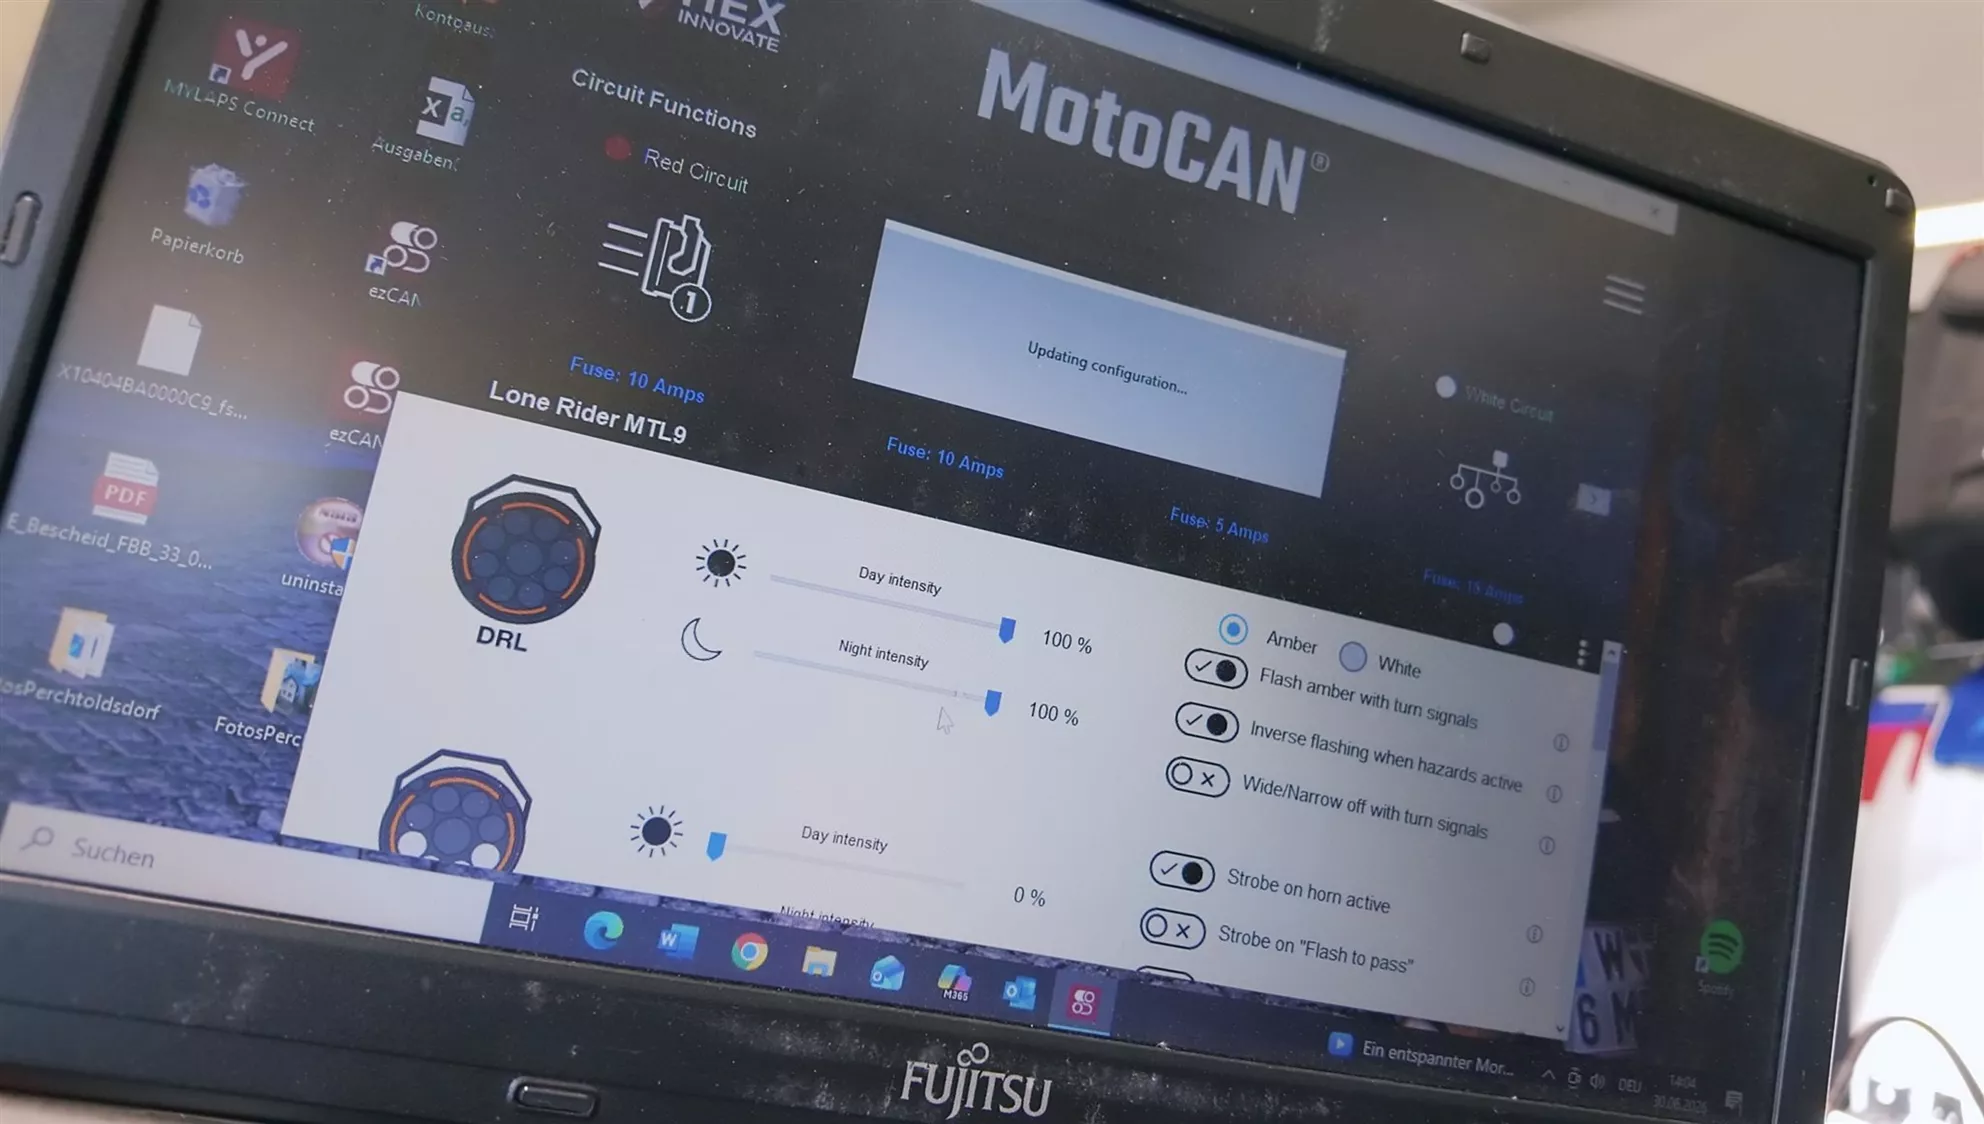
The initial configuration is not done via a smartphone but through desktop software and a USB connection. After registration and firmware check, the program scans the connected devices and displays the functions of the MTL9. The white MotoCAN channel is used for the lights and, according to the installation instructions, is configured with a 15-amp fuse.

Technically sound, but somewhat old-fashioned for the year 2026: pull out the laptop, plug in the cable, turn on the ignition, and wait for the update. An app would be more convenient, though, to be fair, you won't need to tweak the basic light parameters every week.

Adjustable settings include the intensity of the position light ring for day and night, its color, the output of the broad and far-reaching light areas, and several responses to vehicle signals. The software shown allows for a minimum ring brightness of 10 percent, full power, or complete shutdown. Additionally, the rings can work with the turn signals, react alternately with hazard lights, or be dimmed during certain light functions. Strobe functions with the horn or multiple high beam flashes are also possible. Technically intriguing, but potentially legally tricky in public road traffic, depending on the country and configuration. Not everything the computer allows you to click should end up on the highway.

Lone Rider MTL9 Speed Blending

Light Beam at Standstill or Walking Speed

Lone Rider Speed Blending

One of the most intriguing features is called Speed Blending. Here, the highly focused central spot isn't just abruptly activated with every high beam operation but is instead blended in depending on speed. In the software version shown, the default value is set at 100 km/h, with an adjustable range from approximately 80 to 140 km/h. Below the defined threshold, the system operates with broader lighting, while above it, the additional distance is gradually added. This gives the rider more visibility exactly where the distance covered per second increases.

MTL9 Light Signature

Light Beam at Medium Speed

MTL9 Light Signature

MTL9 Light Signature

Light Beam at High Speed

In practice, this is more sensible than a permanently active 700-meter beam. On a narrow, wet mountain pass, the bright spot on the horizon offers little benefit when the relevant information is thirty meters in front of the front wheel. However, on a fast, straight highway, its utility increases significantly. The threshold should not be blindly adopted from the default. Those who primarily ride winding country roads can choose a lower value; those who travel extensively in densely populated areas should set it higher or manually control the spot as needed.

MTL9 Control via BMW Multi-Controller

BMW Multi-Controller Instead of Additional Switch

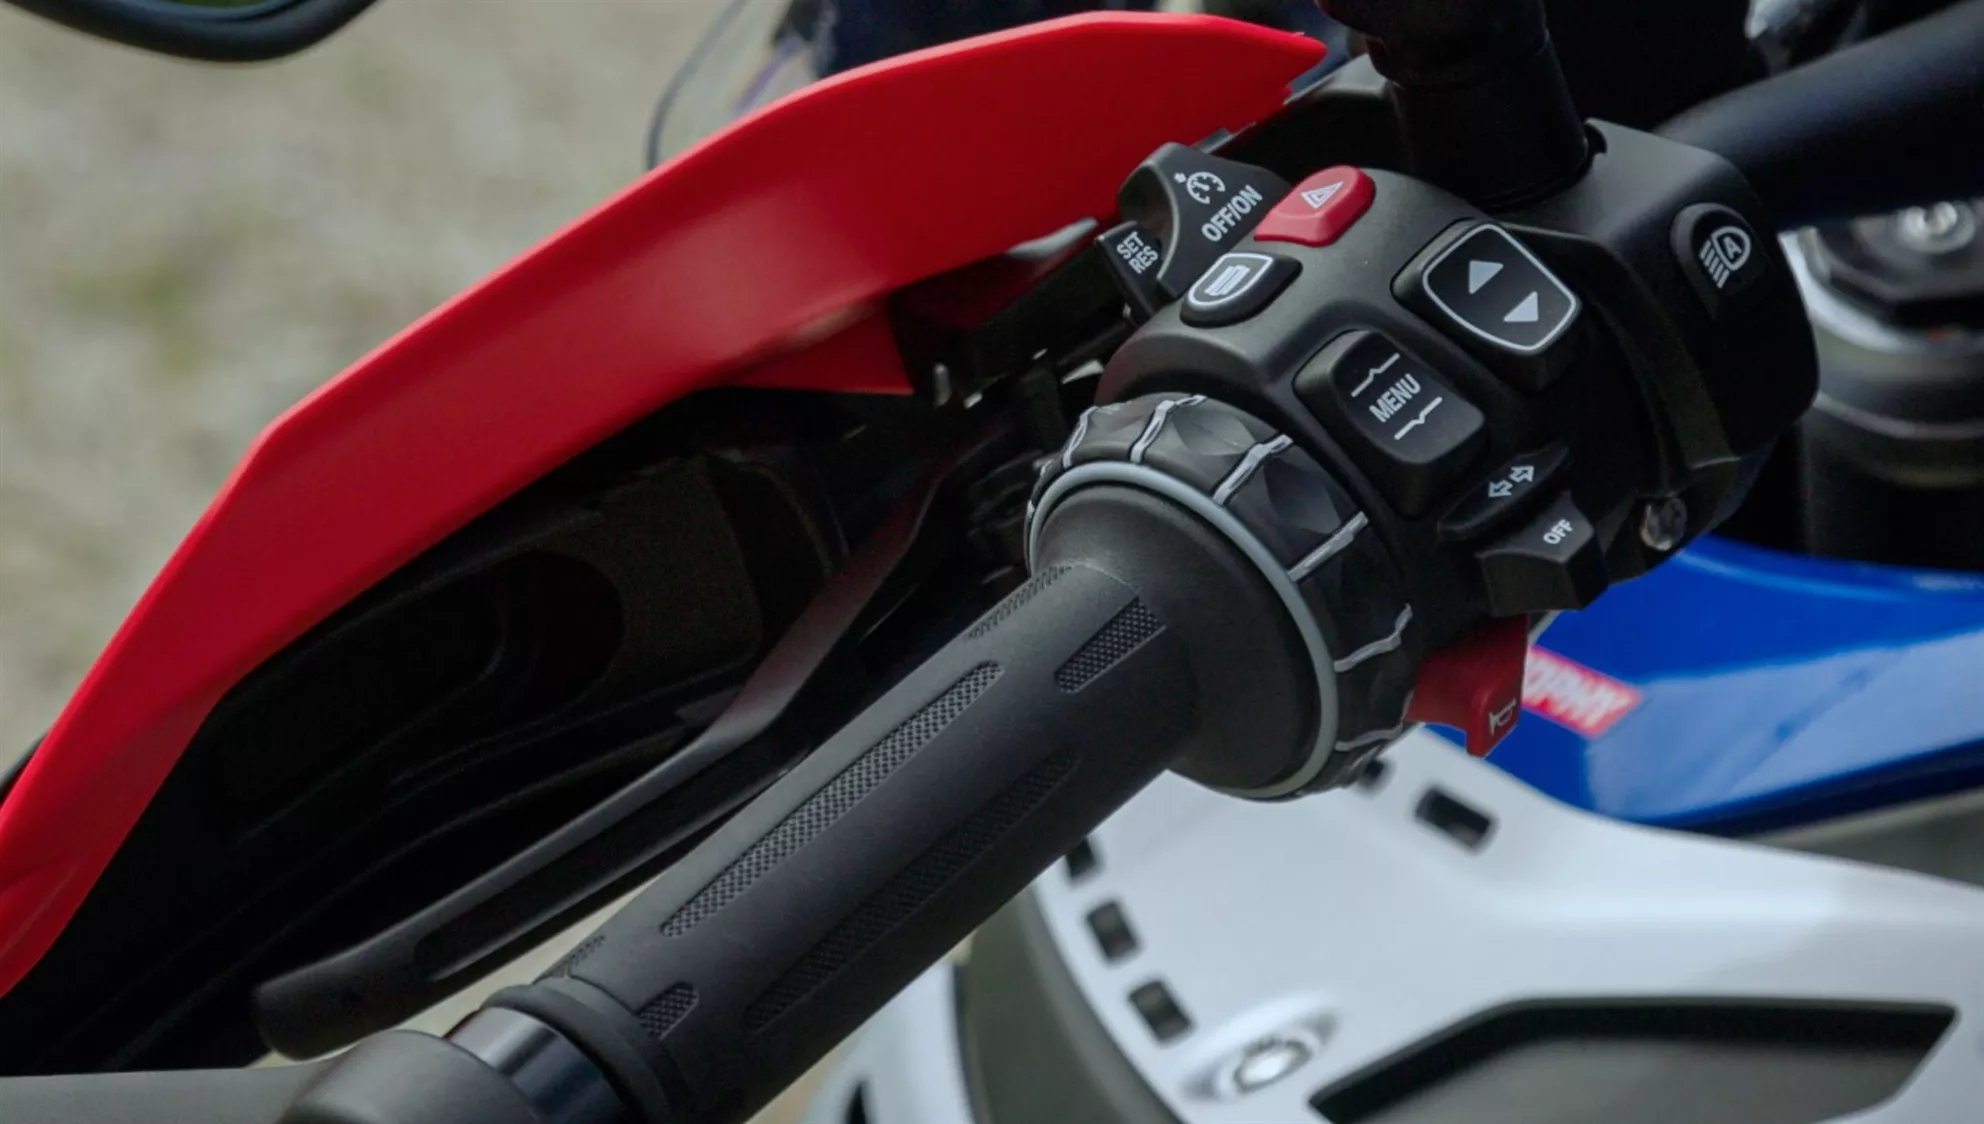
The greatest convenience gain on the BMW wasn't found in the configuration program but directly on the handlebars. When the multifunction ring is pressed outward for about four seconds, the system confirms the switch to adjustment mode. The brightness can then be adjusted using the standard BMW controls. This allows the rider to adapt the light output to traffic, weather, and surroundings while on the move, without needing an additional app or a proprietary dial on the handlebars.

This feature sets the MTL9 apart from many cheaper solutions in everyday use. Traditional auxiliary lights are either on or off, at best complemented by a separate dimmer, whose operation logic you also have to remember alongside cruise control, riding mode, grip heating, and navigation. In contrast, the Lone Rider integrates smoothly into the existing ergonomics of the GSA. After a short familiarization period, adjustments can be made almost blindly, allowing the rider to quickly reduce the output when faced with oncoming traffic.

MTL9 Certification Marks

MTL9 Legality and Approval

For auxiliary lights, the small E-certification mark matters more than the large lumen value. The MTL9s are approved under UN R148 as a front position light of category A, under UN R149 as a high beam headlamp of class B, and additionally under ECE R10 for electromagnetic compatibility. The corresponding markings are located directly on the lens.

However, a component approval does not automatically mean that every installation and software function is permissible everywhere. Correct positioning, symmetrical mounting, appropriate wiring, clean alignment, and above all, ensuring that no one is blinded remain crucial. An approved light and an installation compliant with that approval are legally two different things.

Blinker and strobe functions are particularly critical. Their technical availability does not imply approval for use on public roads. In case of doubt, testing centers, workshops, or authorities should verify which settings are permissible in the respective country.

MTL9 Daytime Visibility

Daytime Visibility of the Lone Rider MTL9

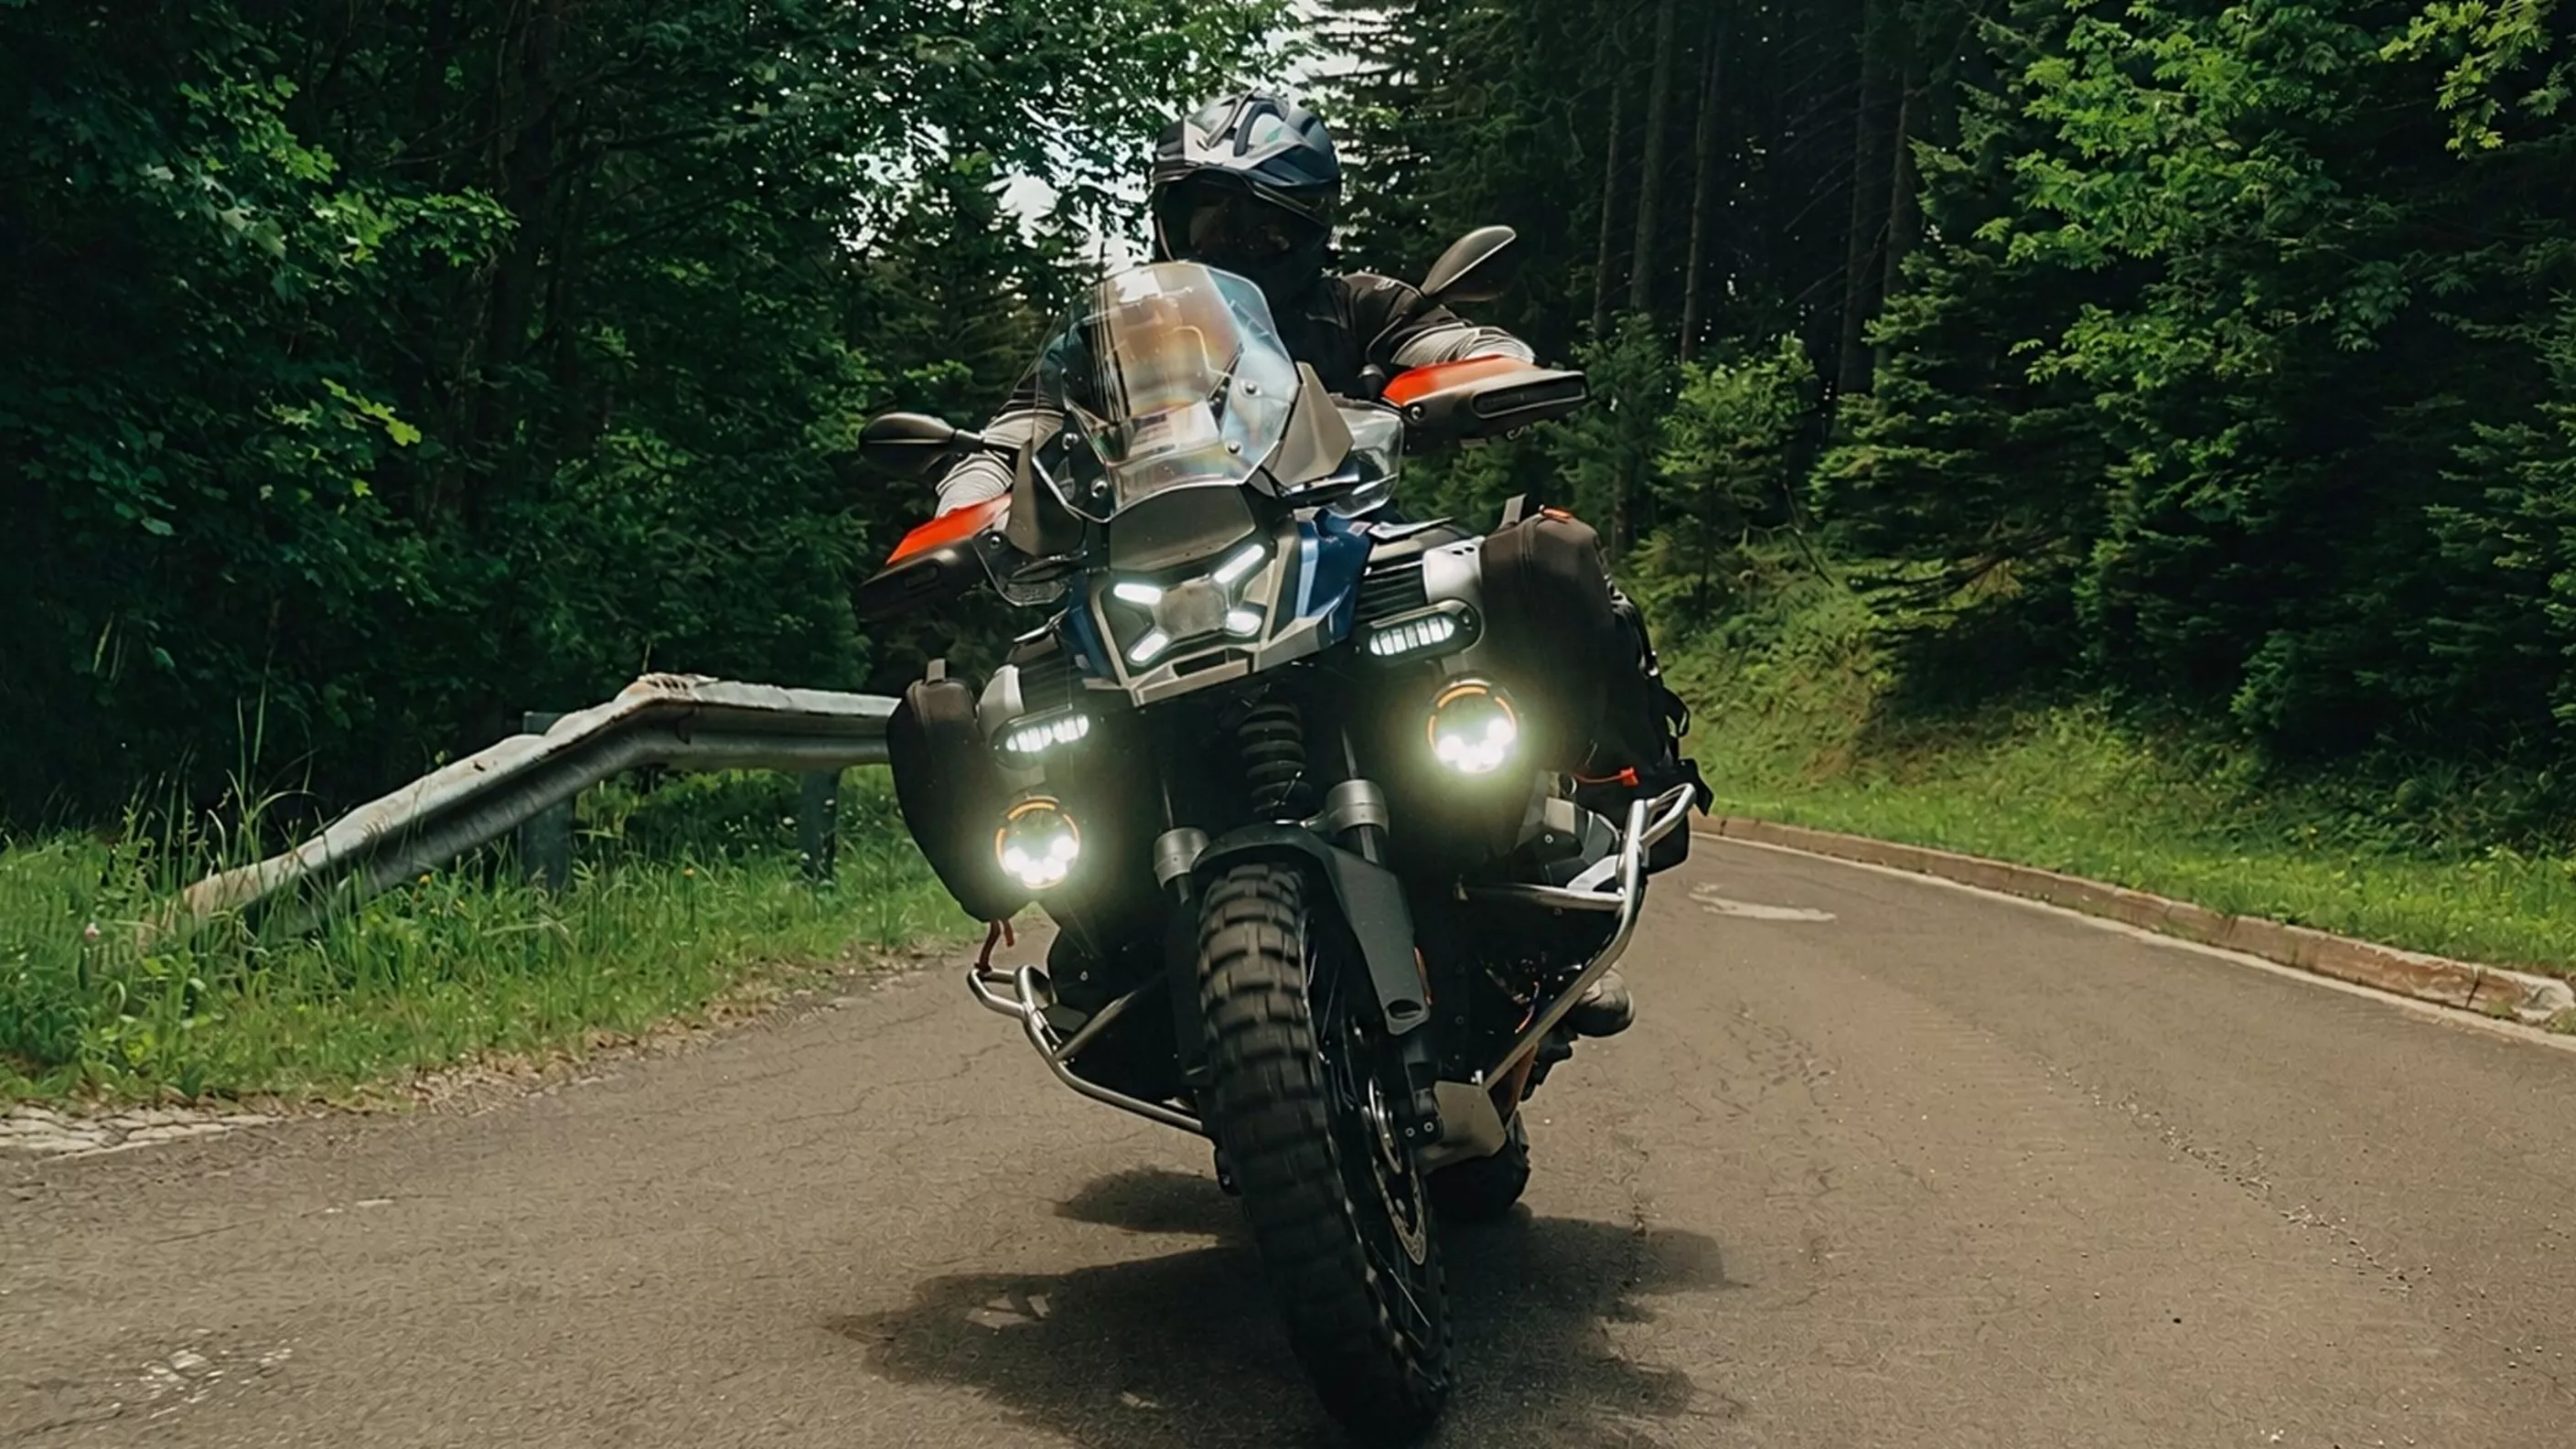
During the day, the greatest benefit is not in roadway illumination but in the enhanced visual silhouette. The main headlight and the two lower-mounted MTL9s form a noticeable triangle, making an oncoming motorcycle stand out more easily from the visual clutter of car headlights, reflections, and road signs. The amber ring appears distinctive without necessarily seeming aggressive, while white aligns more closely with the standard BMW light signature. The system's prominence can be configured separately for day and night.

The art lies in the right balance. High daytime brightness can be pleasantly visible on wide, bright roads, but already bothersome in rearview mirrors in shaded avenues or with a low sun. Quick adjustment on the motorcycle is, therefore, a real safety feature. Visibility is good. Courtesy is better.

MTL9 at Night

Night Ride on the Road with Lone Rider MTL9

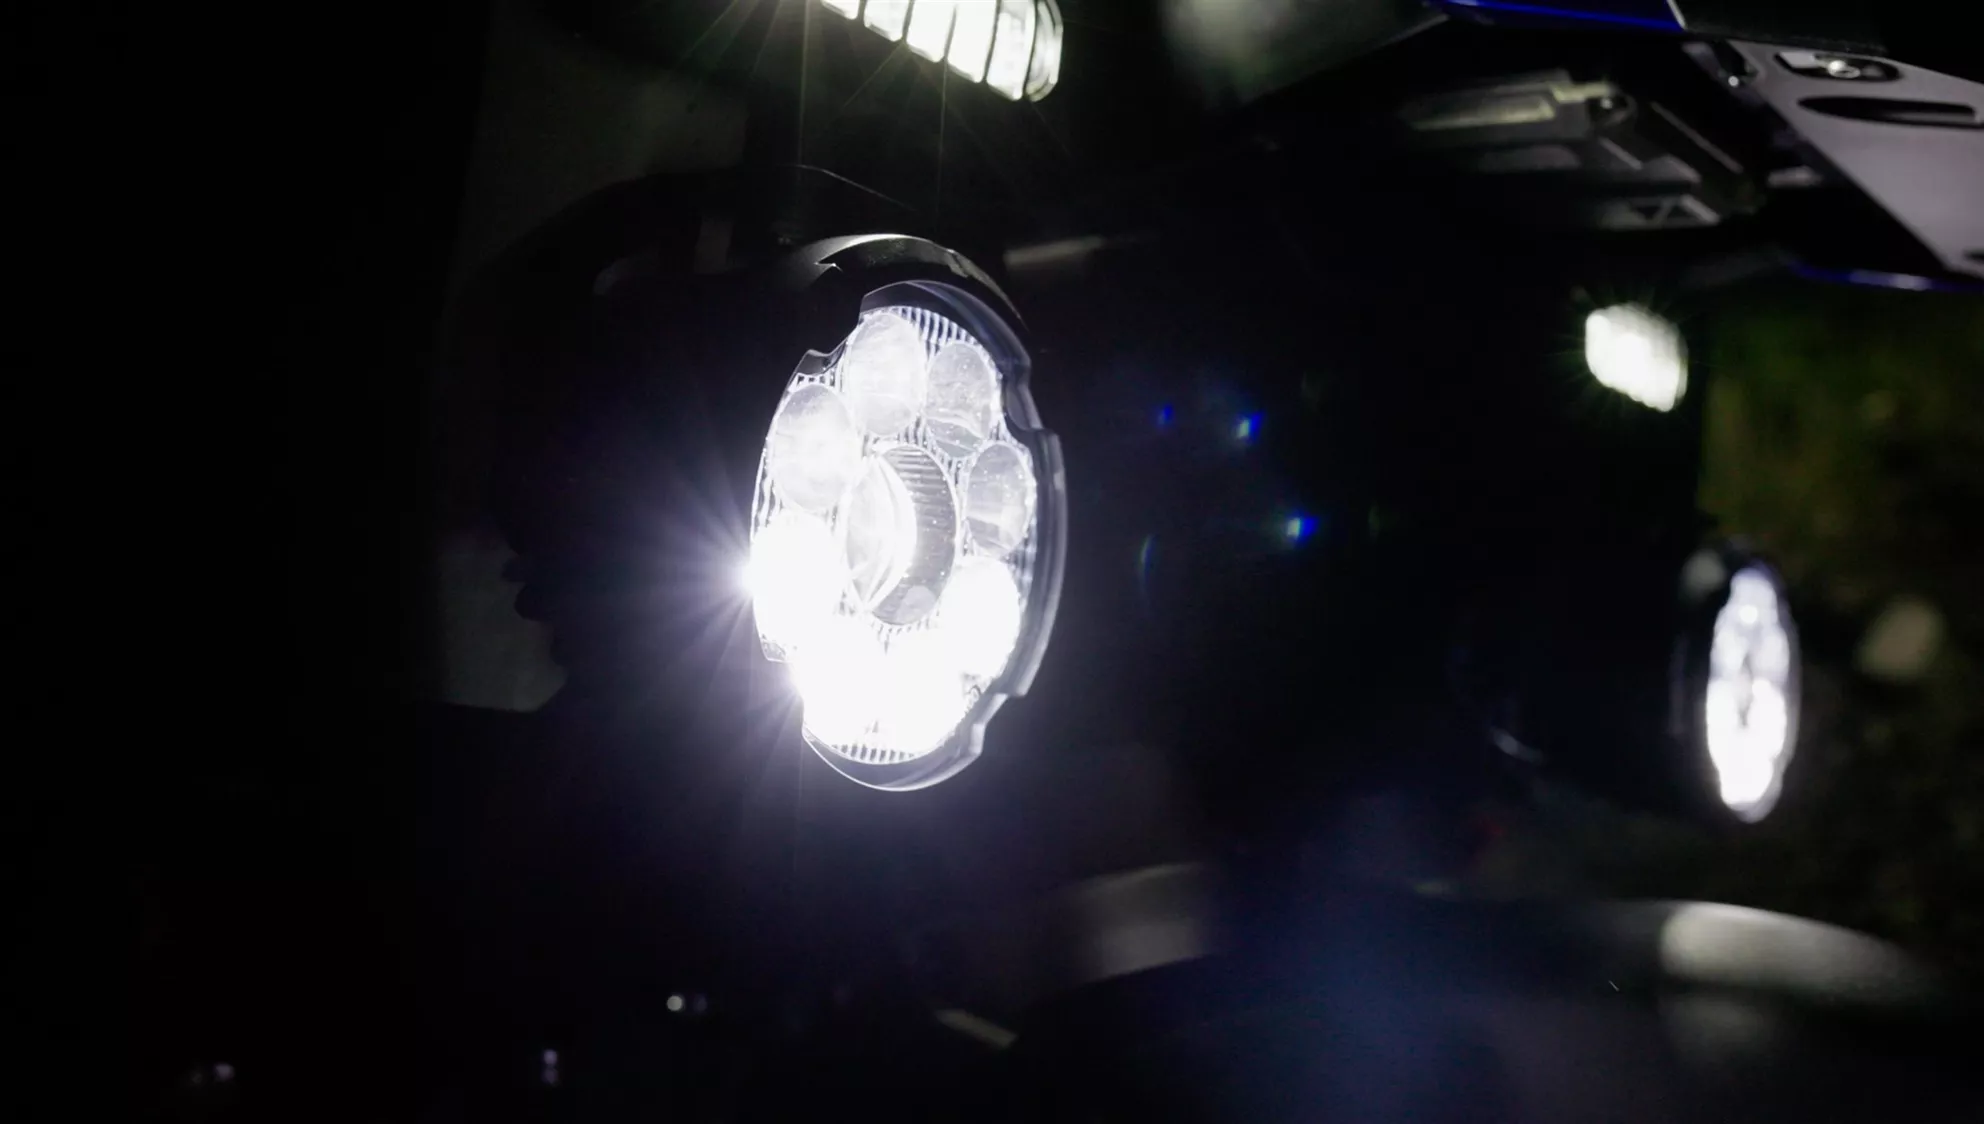
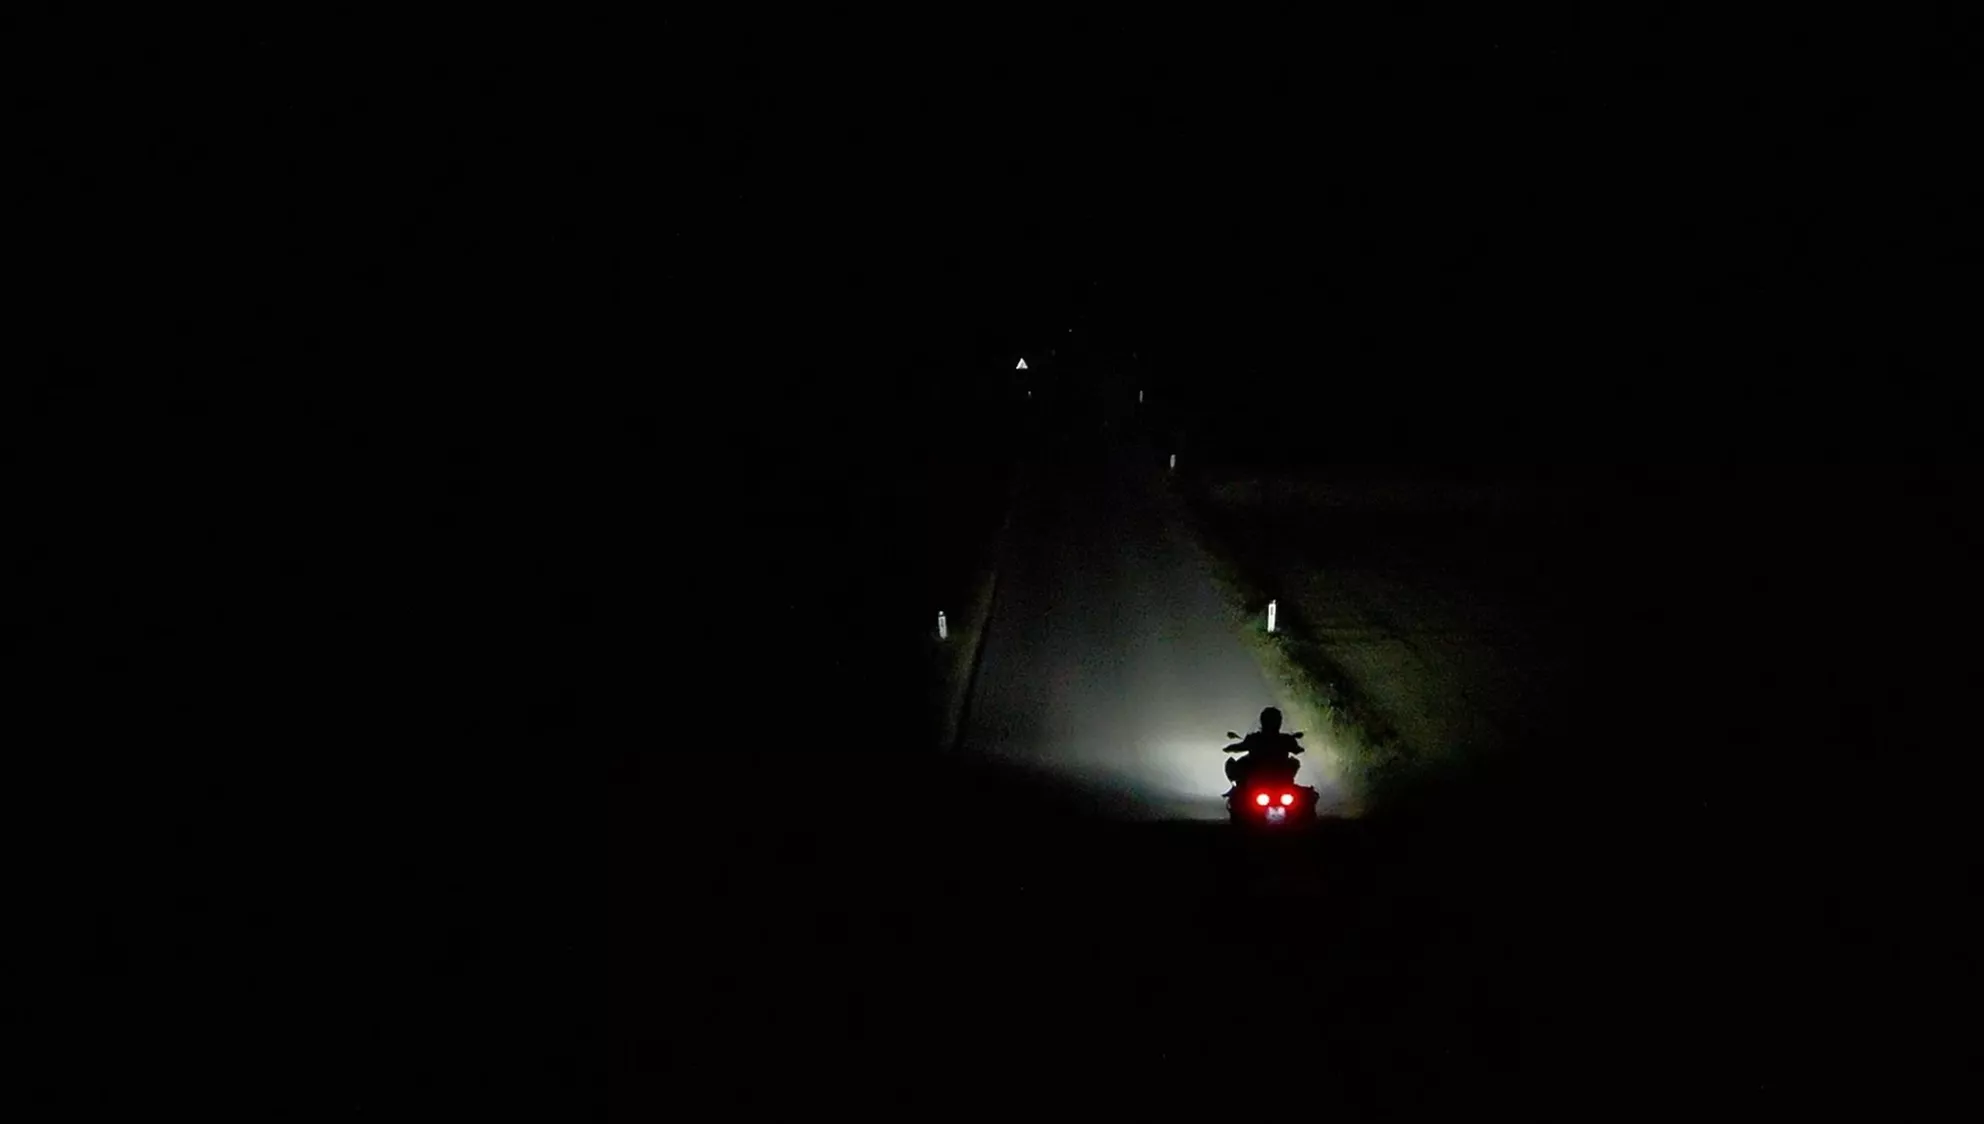
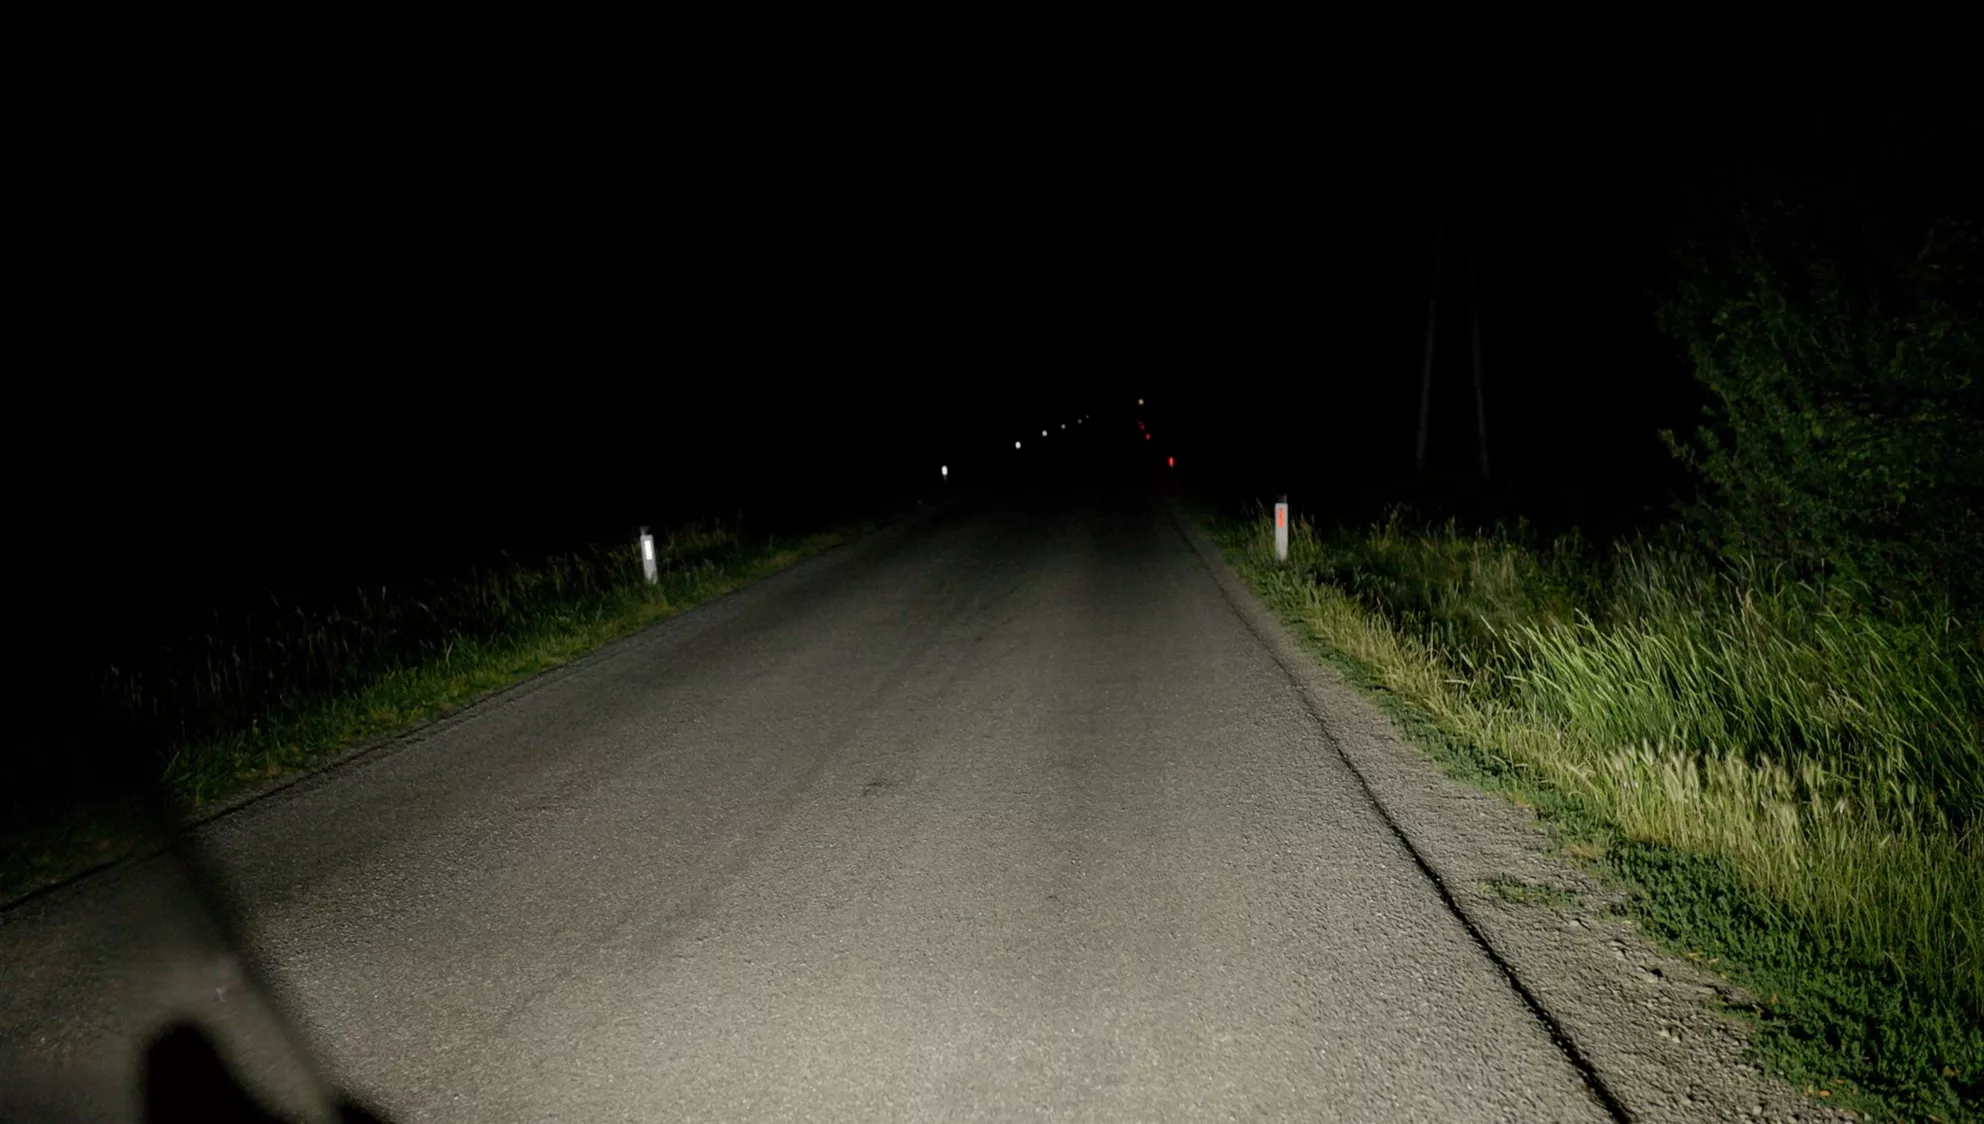
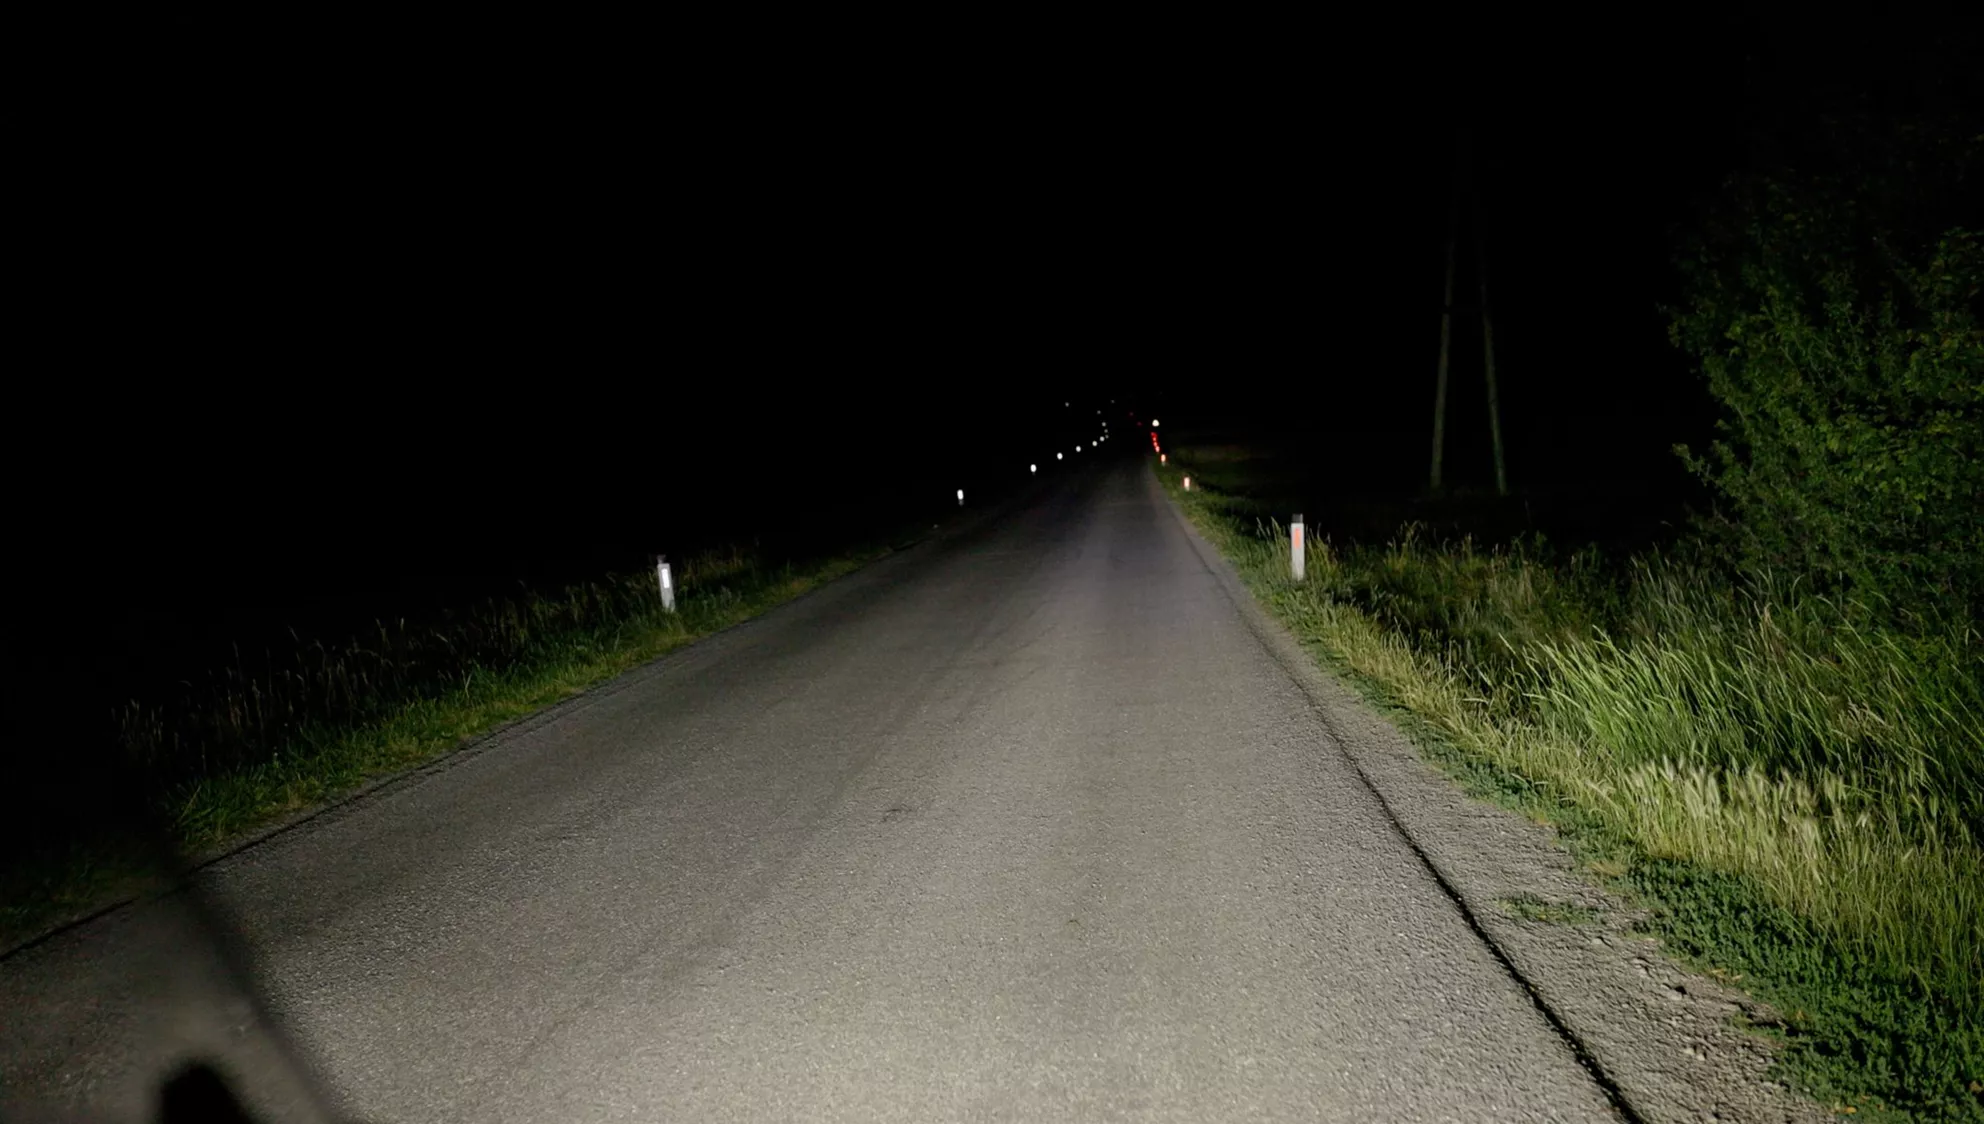
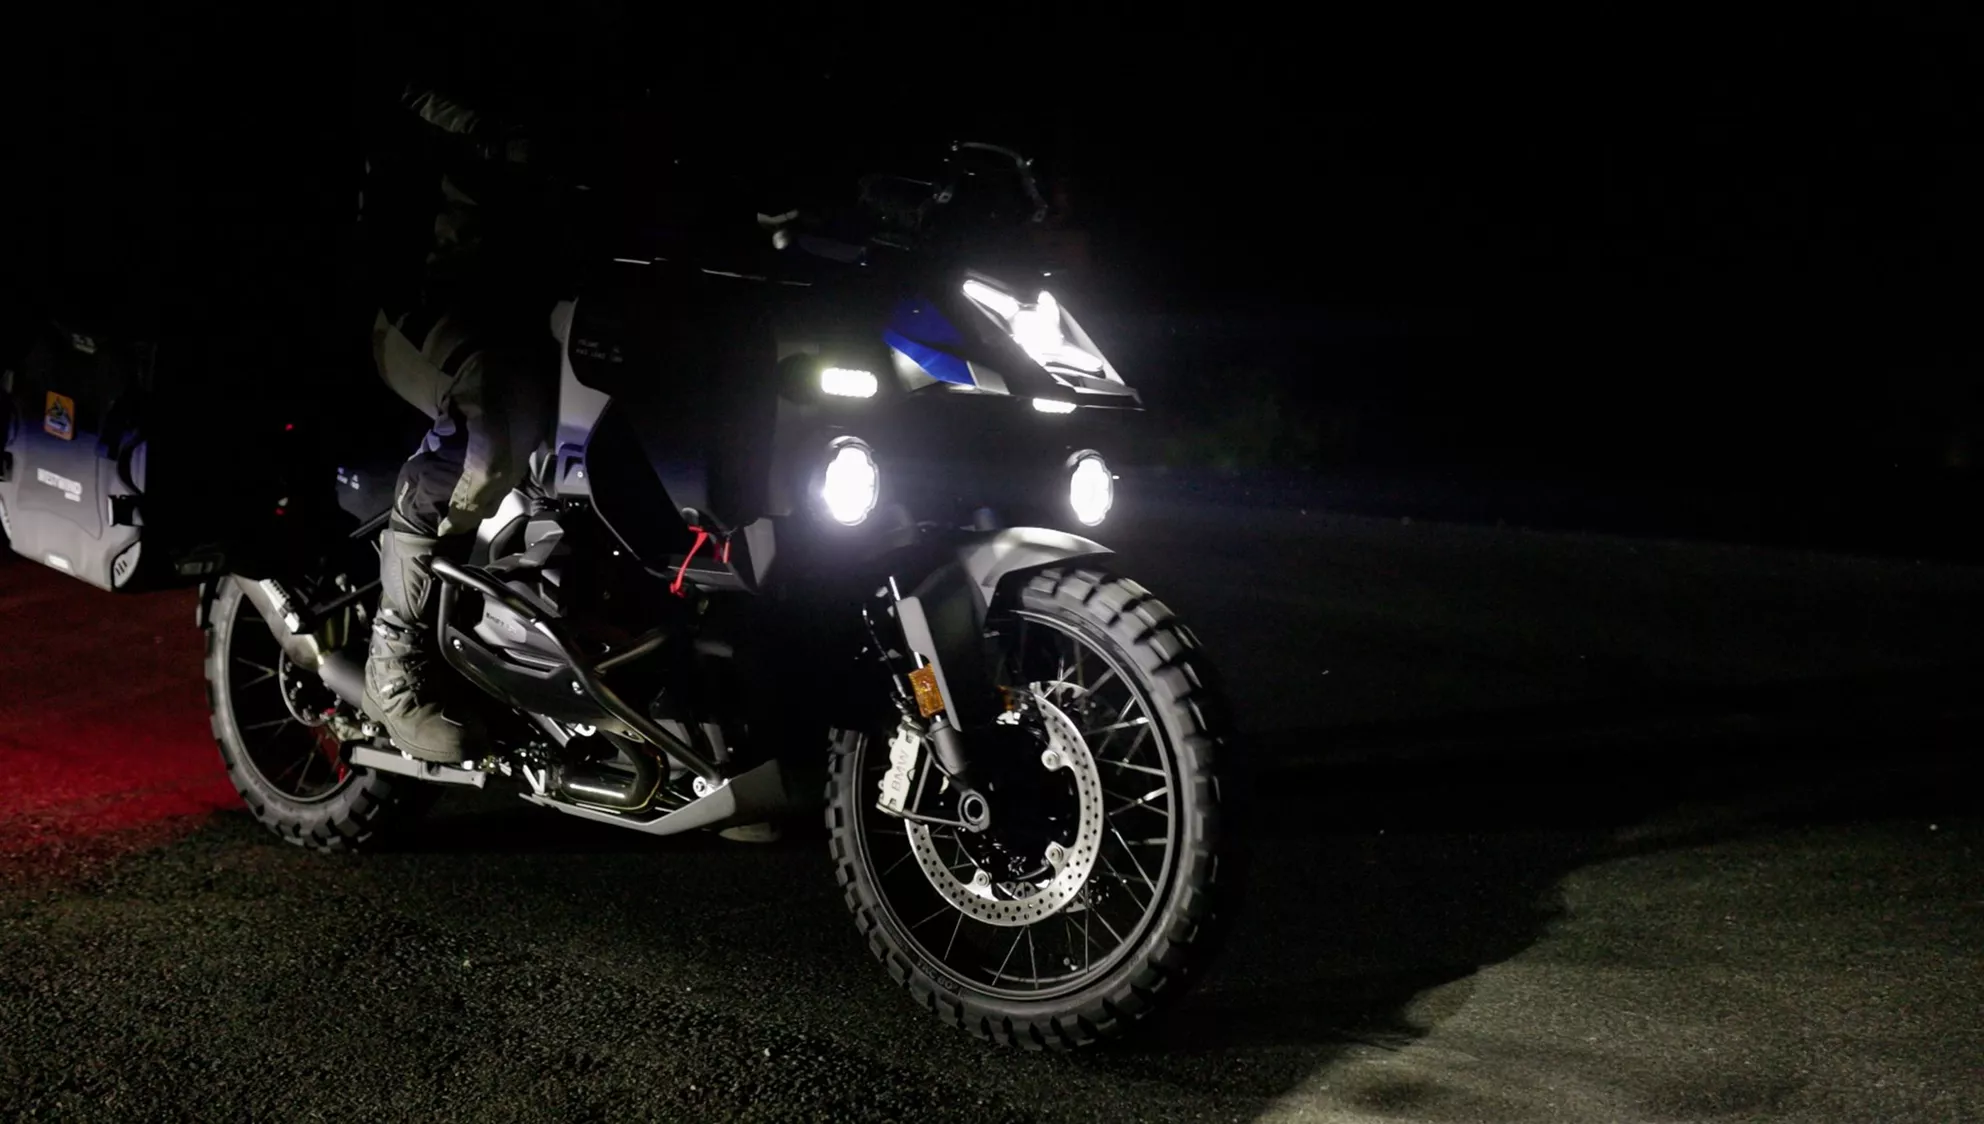
Although the BMW R 1300 GSA already comes equipped with a decent standard headlight, the light pattern changes fundamentally with the Lone Rider MTL9. The broad light carpet fills the dark zones right next to the road, makes curve entries readable earlier, and brings forest edges, junctions, and potential wildlife crossing zones much more into focus. Instead of a single bright spot, a larger information area emerges, which also makes the bike's feel more relaxed. The high beam then delivers a punch from the depths: the upper LED segments push the existing BMW light beam significantly farther, while the central spot creates an additional, compact light ball at the end of the visible range. The robust manufacturer value is 1 lux at 700 meters. Our test rider Frankee reported a subjective visibility distance of up to approximately one kilometer after two night rides. This isn't a measured laboratory range, but it credibly describes how far away outlines and reflections can still be perceived.

However, the raw power also has a downside: the brighter the high beam, the harsher the switch back to low beam, as the eyes and perception have adjusted to the significantly brighter environment. Therefore, the MTL9 should not be operated at maximum power by default, but as strong as necessary and as restrained as possible. This is where the separate settings and Speed Blending pay off. The rider can maintain high broad illumination, but only activate the extreme spot when speed and road conditions truly justify it.

MTL9 Night Shot

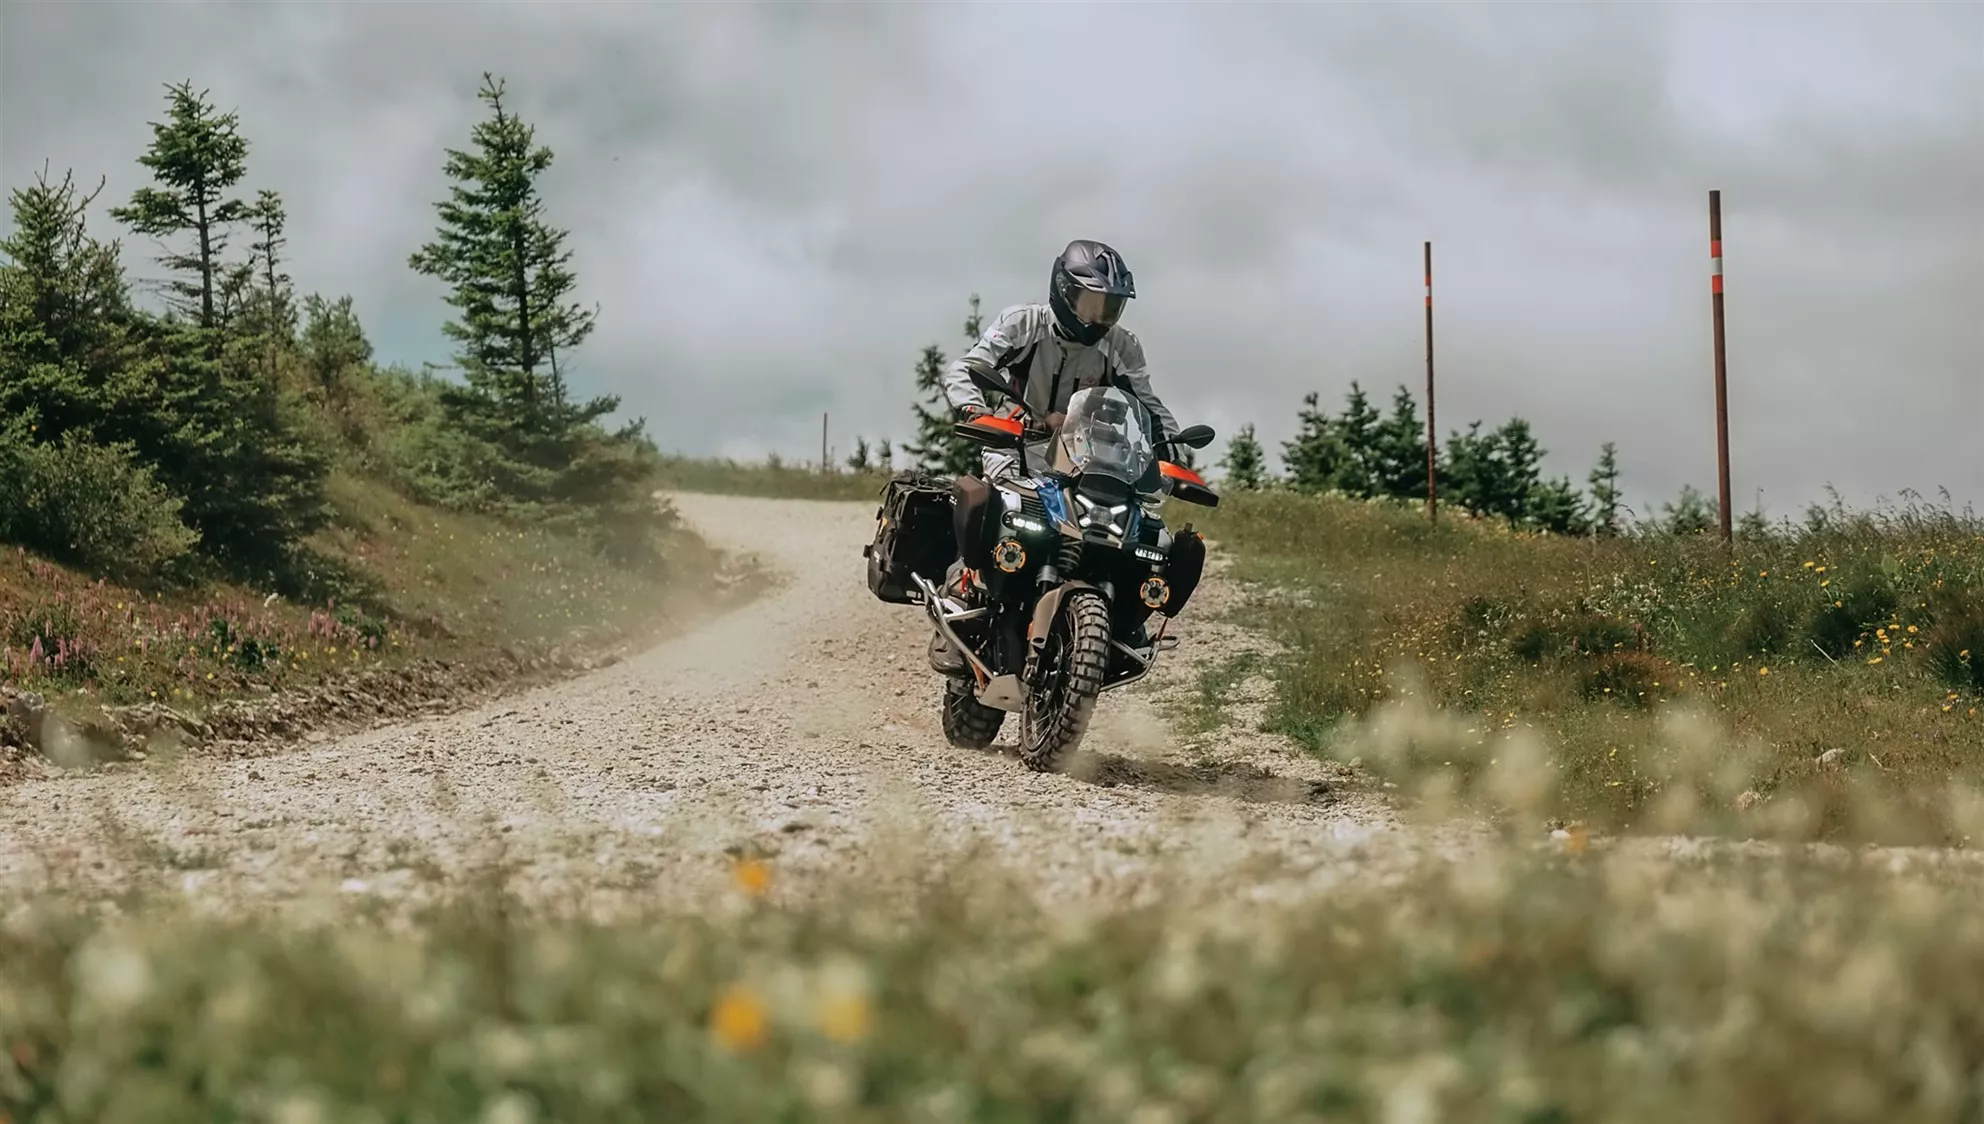
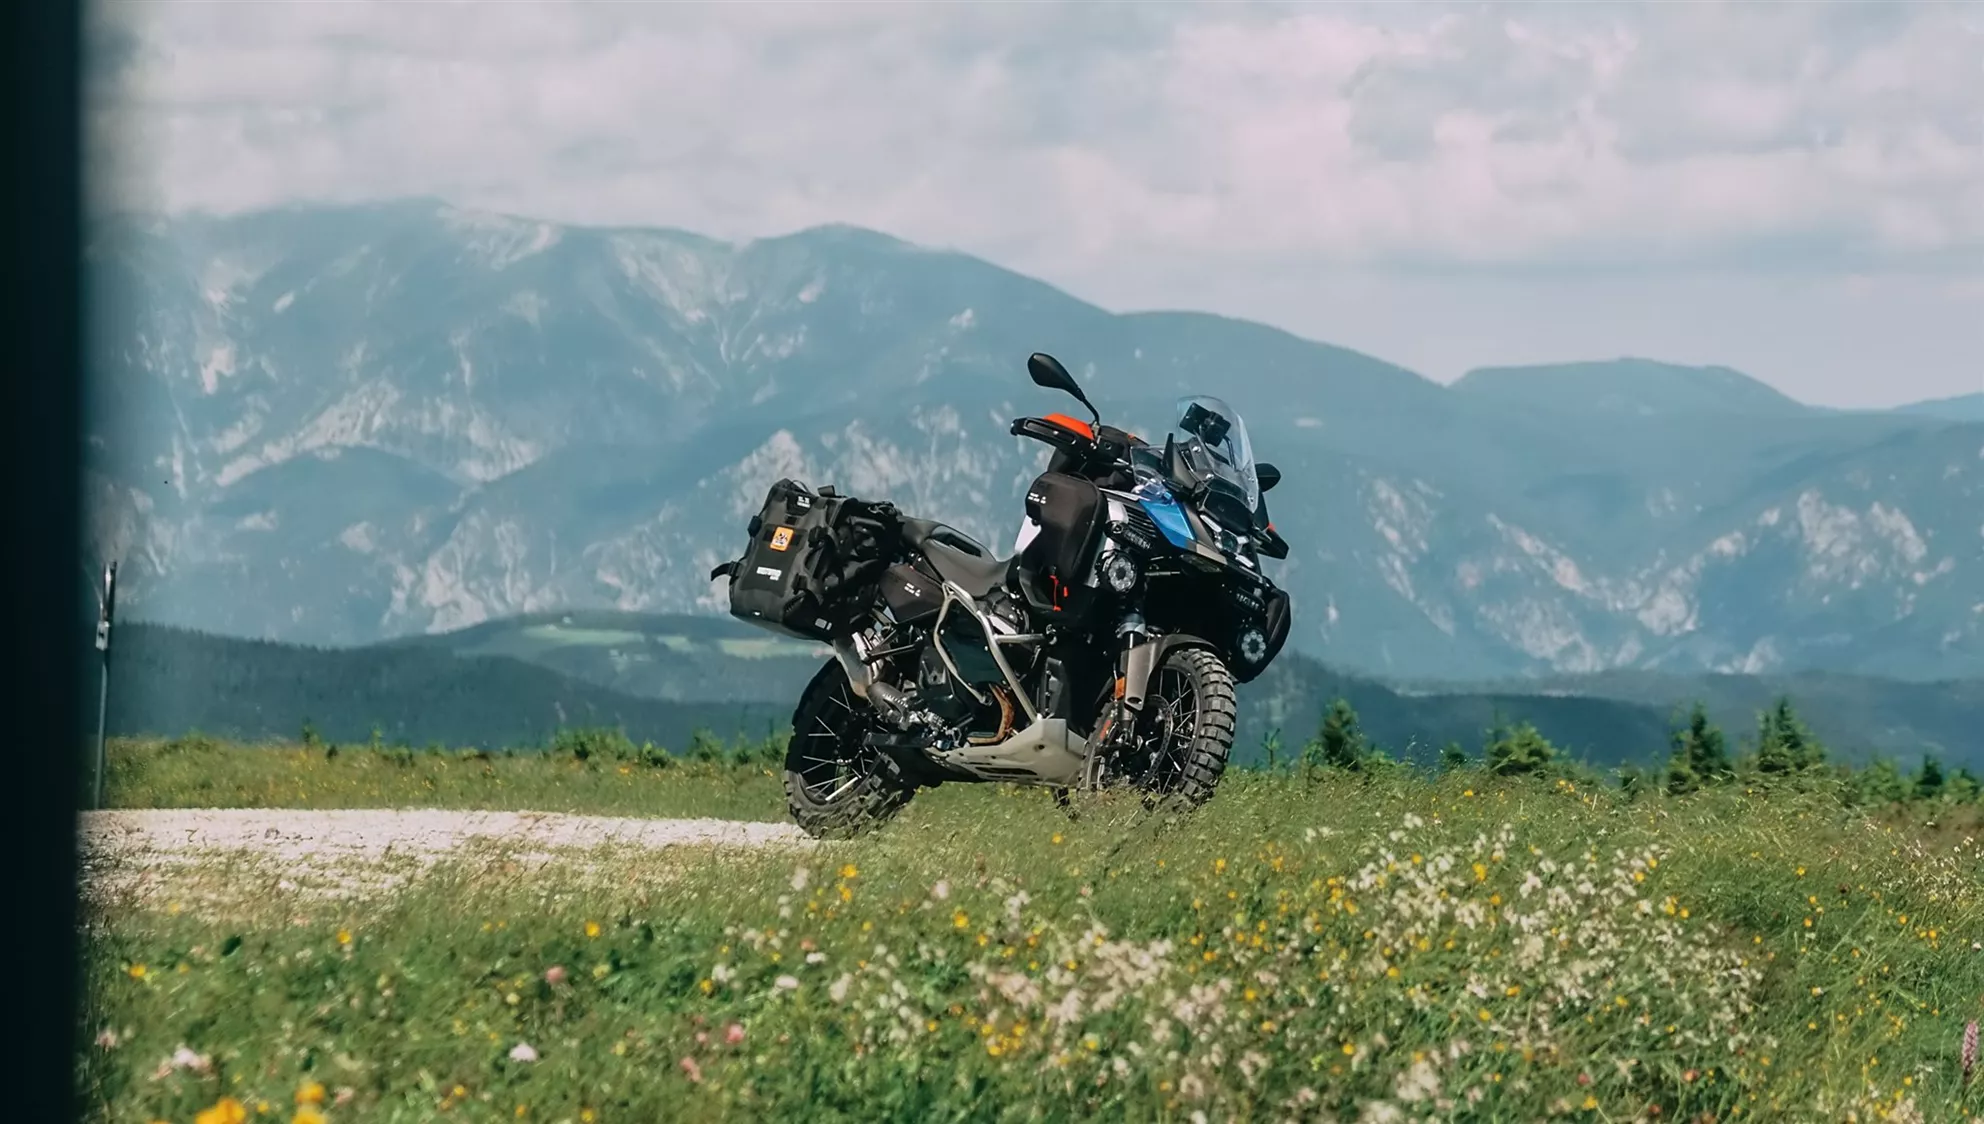
Night Ride Off-Road with the Lone Rider MTL9

Off-road, it's not the theoretical maximum range that's the star, but the broad close-range illumination. Ruts, loose stones, branches, and sloping terrain need to be detected early, while the central high beam on a winding forest path often shines into the bushes or directly against the next slope. The lower four LEDs per pod create the more valuable light carpet here because they illuminate the area in front of the front wheel and the side escape routes. The rider can quickly decide whether the dark spot is a shadow, a hole, or just a wet stone.

The massive amount of light tempts you to ride at night almost as if it were day. This works surprisingly well, but it doesn't change the fact that contrasts, depth perception, and unexpected obstacles appear differently under artificial light. On dusty trails, the spot should be reduced because self-glare increases significantly. This is where the advantage of the system becomes evident again: not one lamp has to do everything somehow, but multiple light zones can be combined to suit the situation.

MTL9 Off-Road Use

MTL9 Durability in Practical Testing

During our rides on both road and off-road, the MTL9 performed reliably and inconspicuously. There were no outages, annoying flickering, or noticeable changes in alignment. However, the high weight and sturdy mounts require a clean installation with properly tightened screws, protective layers, and neatly routed cables.

Thermally, the lights remained stable as well. Naturally, not all of the 145 watts of power consumption is converted to light; some of it ends up as heat within the housing. Even with prolonged use and little cooling wind off-road, no overheating was detected. Large cooling fins and the massive aluminum body dissipate the heat into the surrounding air. According to the manufacturer, the system is rated for -20 to +50 degrees Celsius. We did not conduct an instrumented temperature test, so specific reserves cannot be accurately quantified.

With IP68 and IP69K ratings, the MTL9 are also protected against dust, water, and intensive cleaning. Rain, mud, water crossings, and subsequent washing clearly fit within the intended usage profile. However, using a pressure washer from ten centimeters away is still a bad idea.

Disclaimer: Our test spanned two weeks and included two intensive night rides as well as various usage conditions, but not a multi-year long-term test. Statements about corrosion after five winters or the lifespan of the permanently installed LEDs would therefore be pure speculation. Reassuring is the five-year manufacturer's warranty, which is worth significantly more for such an expensive and non-modularly repairable product than any "Adventure tested" sticker.

MTL9 Practical Impressions by Frankee

1000PS Editor Frankee (Off-Road Specialist)

Frankee's Practical Insights

After installation and configuration, the technical complexity pleasantly fades into the background. High beams and brightness can be controlled via the familiar BMW controls, making the Lone Rider MTL9 lighting system feel more like a sophisticated factory option than aftermarket accessories. However, deeper settings such as light color, day and night profiles, or Speed Blending still require a computer and cable. A smartphone app would be a logical upgrade here, as spontaneous changes on the go would be handled much more elegantly.

After two intensive night rides, Frankee described the MTL9 as the most innovative auxiliary lights he has tested so far. He was particularly impressed by the immense light output, the enormous range, and the noticeable safety gain on dark country roads with high wildlife activity. Nevertheless, his favorite detail was not the maximum spot, but the direct adjustment via the BMW multi-controller. This allows the output to be adjusted on the fly to traffic and surroundings, before oncoming traffic is involuntarily subjected to a retina test. His verdict on full high beam was correspondingly succinct: massive.

MTL9 Conclusion

About Lone Rider
Lone Rider is a premium brand for adventure motorcycle accessories, developing gear for riders who feel at home on asphalt as well as gravel and off-road paths. Their modular product system ranges from luggage solutions like MotoBags, MotoPanniers, MotoCase, and ADVBags, to the intelligent MTL9 auxiliary lights and MotoArmor protection components, and even motorcycle-specific tents like MotoTent and ADVTent. All products are designed to work together technically, visually, and functionally. Lone Rider sells directly to customers in over 110 countries and consciously positions itself in the upper market segment. On Trustpilot, Lone Rider currently holds a score of 4.8 out of 5 stars with over 250 verified reviews.

Lone Rider MTL9 Motorcycle Headlights Review Images

Source: 1000PS

Image 1
Image 2
Image 3
Image 4
Image 5
Image 6
Image 7
Image 8
Image 9
Image 10
Image 11
Image 12
Image 13
Image 14
Image 15
Image 16
Image 17
Image 18
Image 19
Image 20
Image 21
Image 22
Image 23
Image 24
Image 25
Image 26
Image 27
Image 28
Image 29
Image 30
Image 31
Image 32
Image 33
Image 34
Image 35
Image 36
Image 37
Image 38
Image 39
Image 40
Image 41
Image 42
Image 43
Image 44
Image 45
Image 46
Image 47
Image 48
Image 49
Image 50
Image 51
Image 52
Image 53
Image 54
Image 55
Image 56
Image 57
Image 58
Image 59
Image 60
Image 61
Image 62
Image 63
Image 64
Image 65
Image 66
Image 67
Image 68
Image 69
Image 70
Image 71
Image 72
Image 73
Image 74
Image 75
Image 76
Image 77
Image 78
Image 79